- Medcera pharmacy portal enables pharmacy centers to connect with fusion effortlessly.
- Pharmacy portal enables fusion to place e-prescription to order at encounter level.
- It makes medication easily accessible to patients.
- Cloud-based e-prescribing allows you control medication orders and pharmacy communication on the go.
- It allows pharmacies to swiftly treat e-prescription orders.
- Supports online drug search and track patient prescriptions and medication.
- click on the link below to access medceara pharmacy portal.

2.1 Login
- Click on the link below to open pharmacy portal as shown below https://connect.medcera.com/

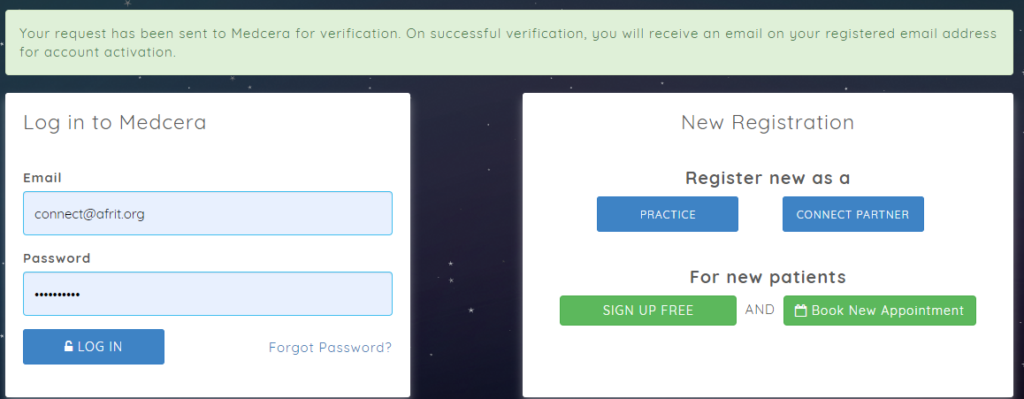
- Click on “Register/Login” button to register or to login.
- If you are a new user, click on “Register new as a” CONNECT PARTNER.
- Fill out the mandatory fields as shown in the screen below.
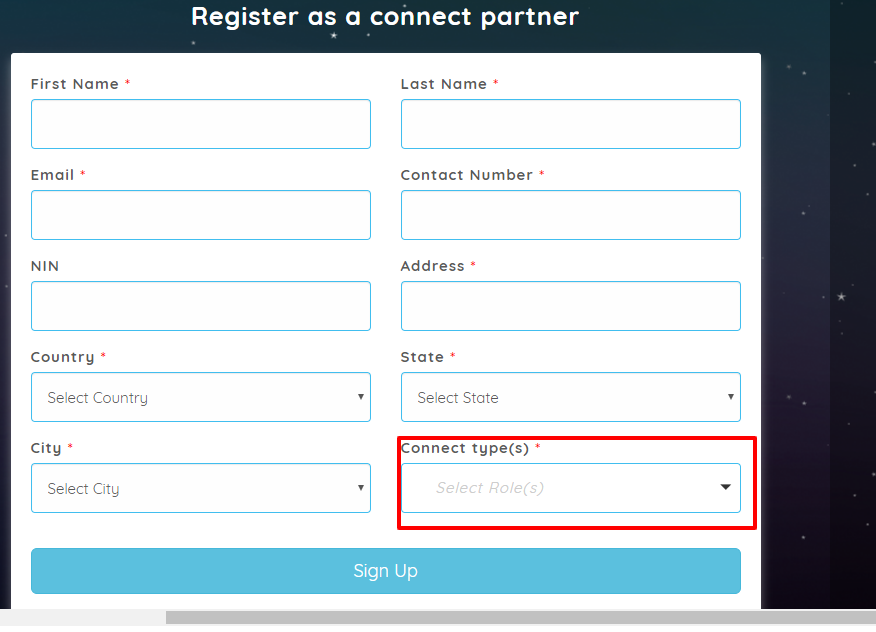
- In the above screen, select “Pharmacy” as “Connect Type.” There is option to choose multiple roles: Pharmacy, Lab, Imaging and Insurance.
- Upon successful registration, the message below displays.
- An Email will be sent to your registered Email ID.
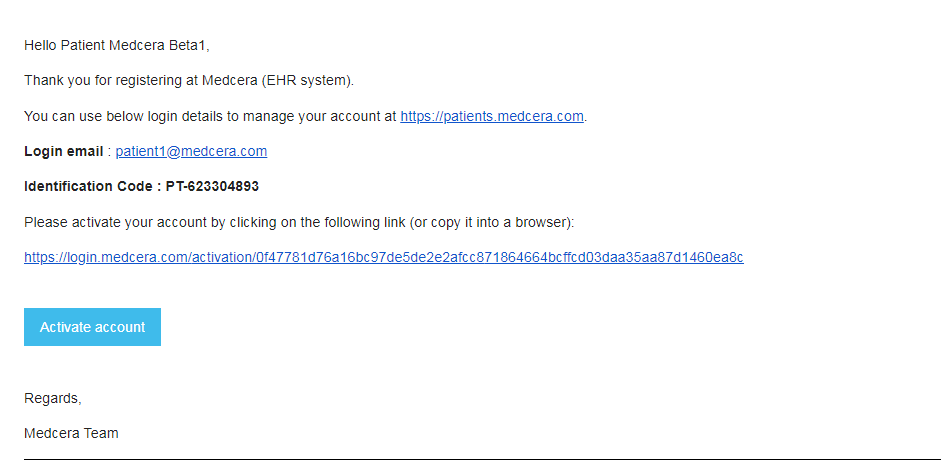
- Click on “Activate account” tab as seen above.
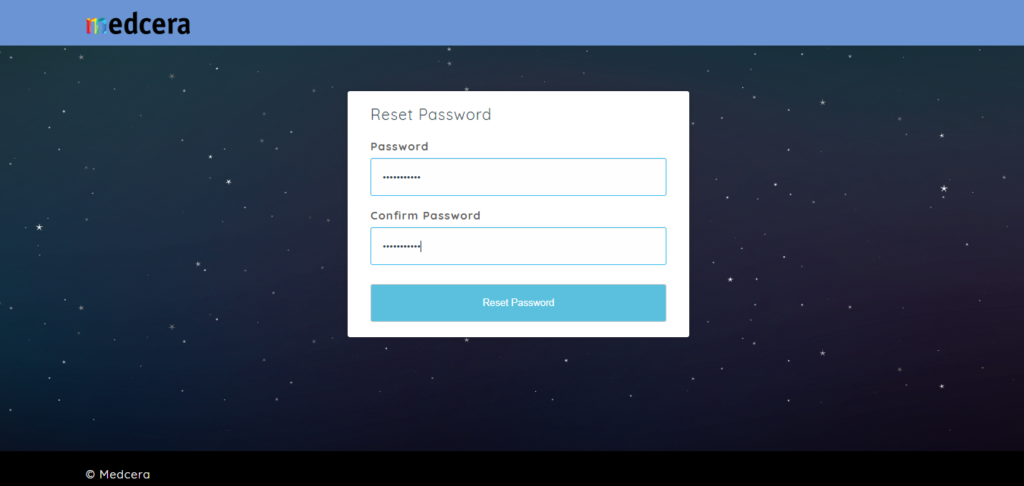
- Reset your password and confirm your password.
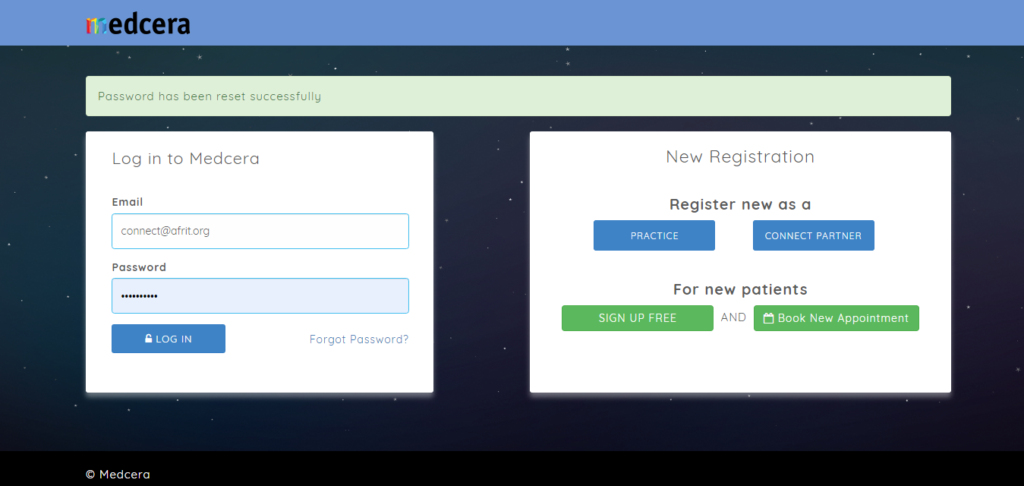
- On successful password reset, your account will be activated as shown below.
2.2 Log In
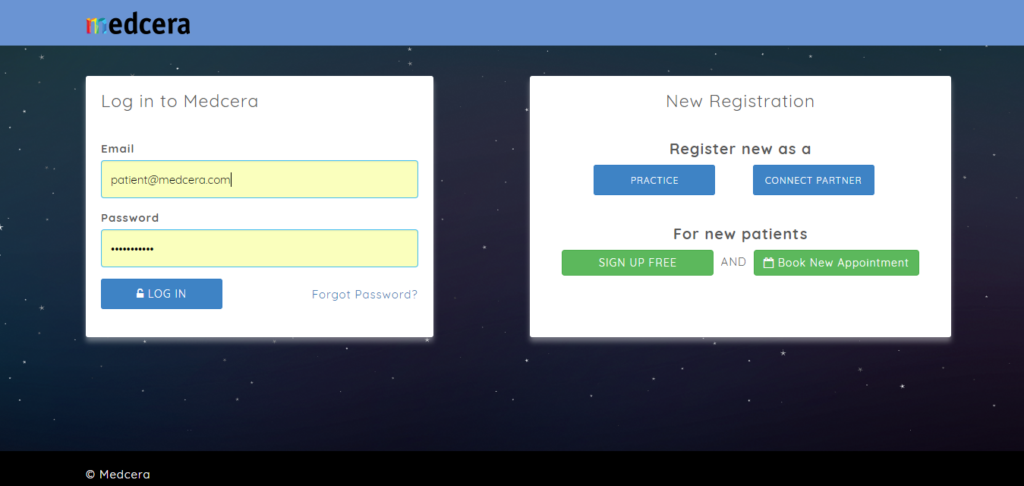
- After account activation, you will able to login using this link https://login.medcera.com/
- On successful login, user will be redirected to Medcera dashboard.
- Note that you will see Lab Dashboard by default.
- Click on Lab tab beside help button at the top right corner of the dashboard and select “Pharmacy” as seen below.
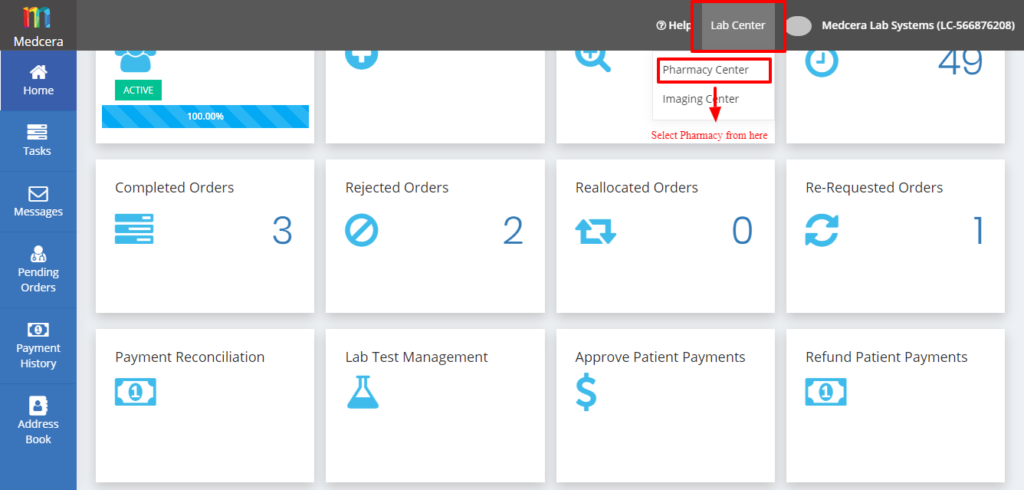
- See Pharmacy dashboard below.
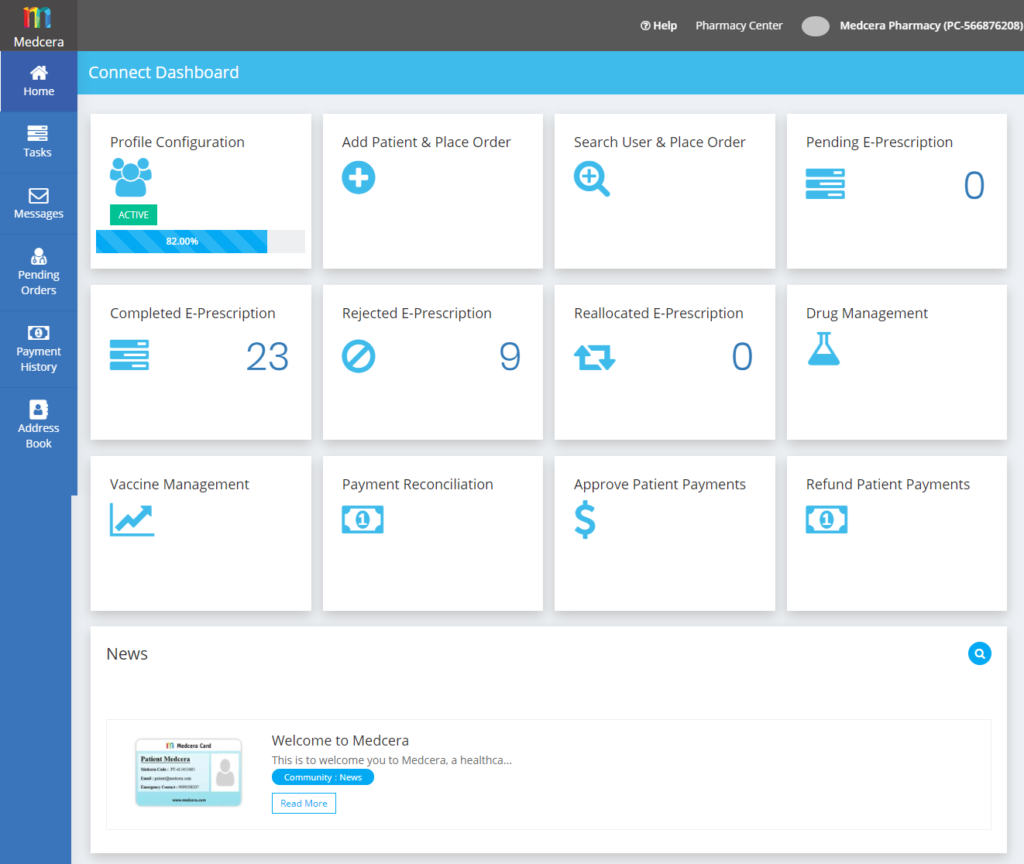
- Users logging in for the first time will have to fill out their further personal details by clicking on “Account Configuration” menu at the top right corner on your dashboard.
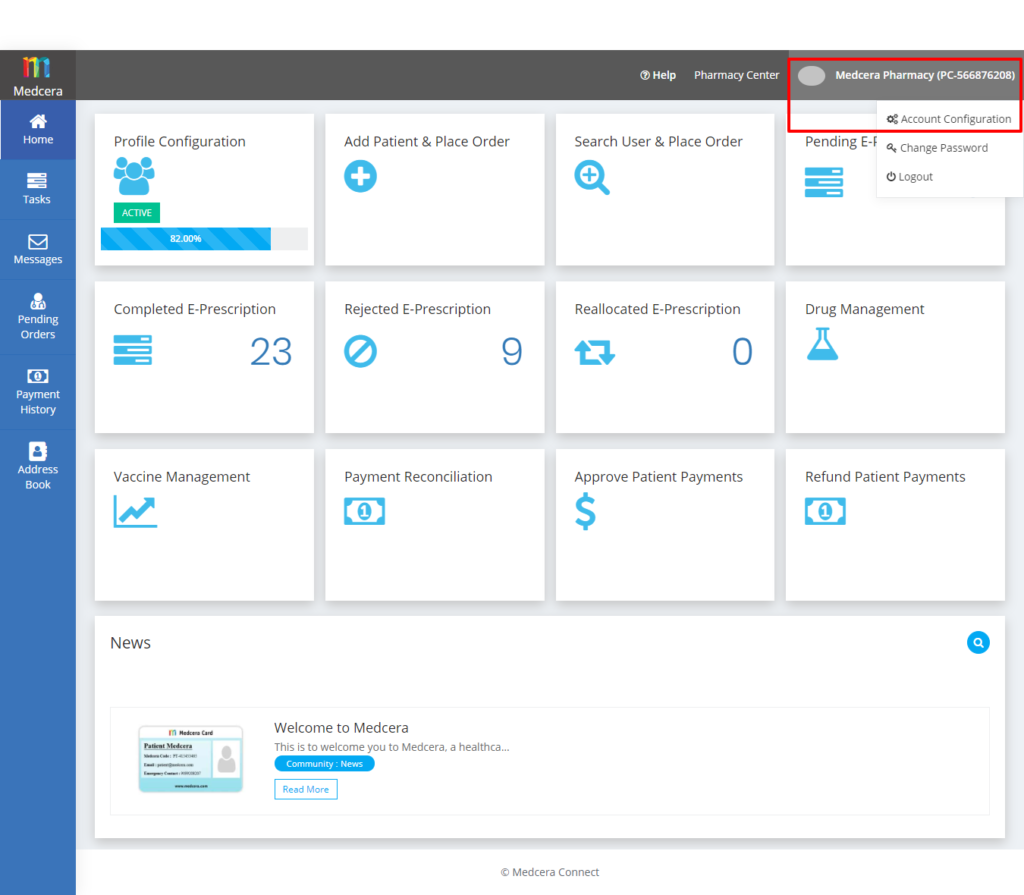
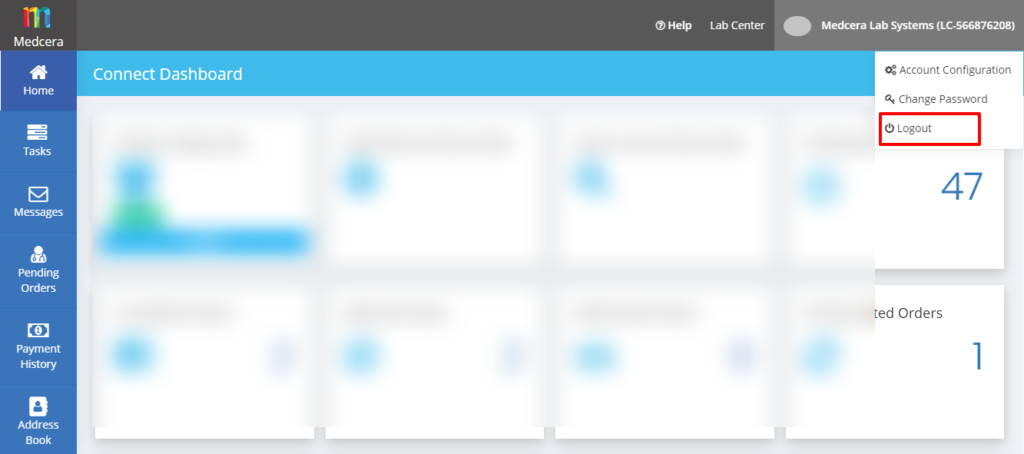
- A click on profile drop-down menu displays the three options below.
- Account Configuration
- Change Password
- Logout
- Click on “Account Configuration” from the drop-down.
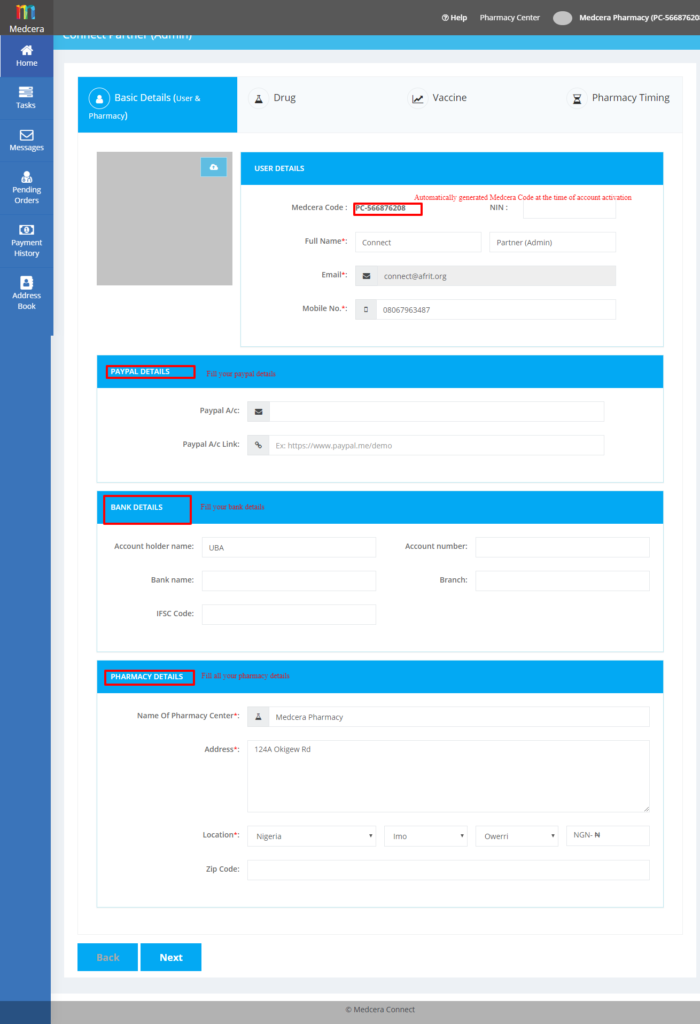
- The page below displays details such as personal information, PayPal Details, Bank details, and Pharmacy Details of user or Pharmacy.
- Note that currency will be set based on country selected by user.
- Under configuration, the page below shows the list of drugs including drug name, batch number, batch date, manufacturing date, expiry date, measurement date, prices, and action.
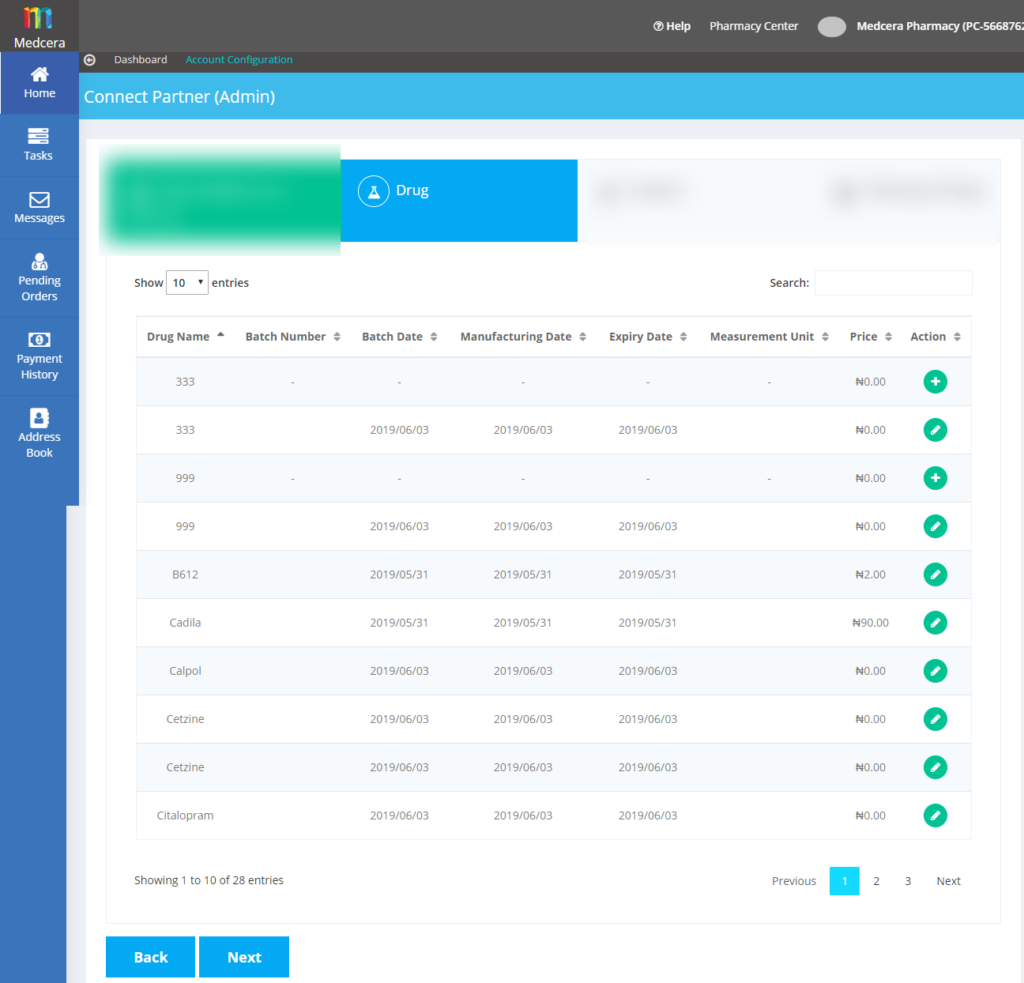
- Note that new drugs added by pharmacy center are approved by Medcera admin.
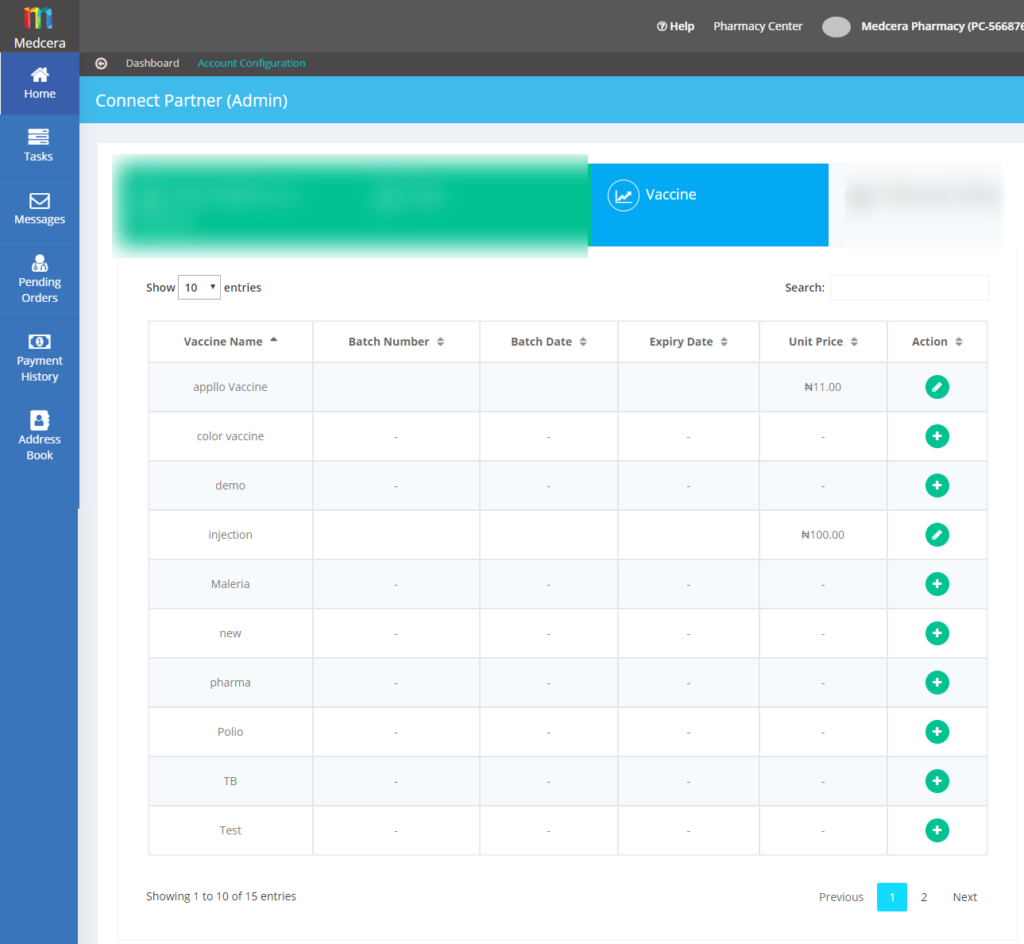
- The page below shows the list of vaccines including vaccine name, batch number, batch date, expiry date, unite price and action.
- Note that new vaccines added by pharmacy center are approved by Medcera admin.
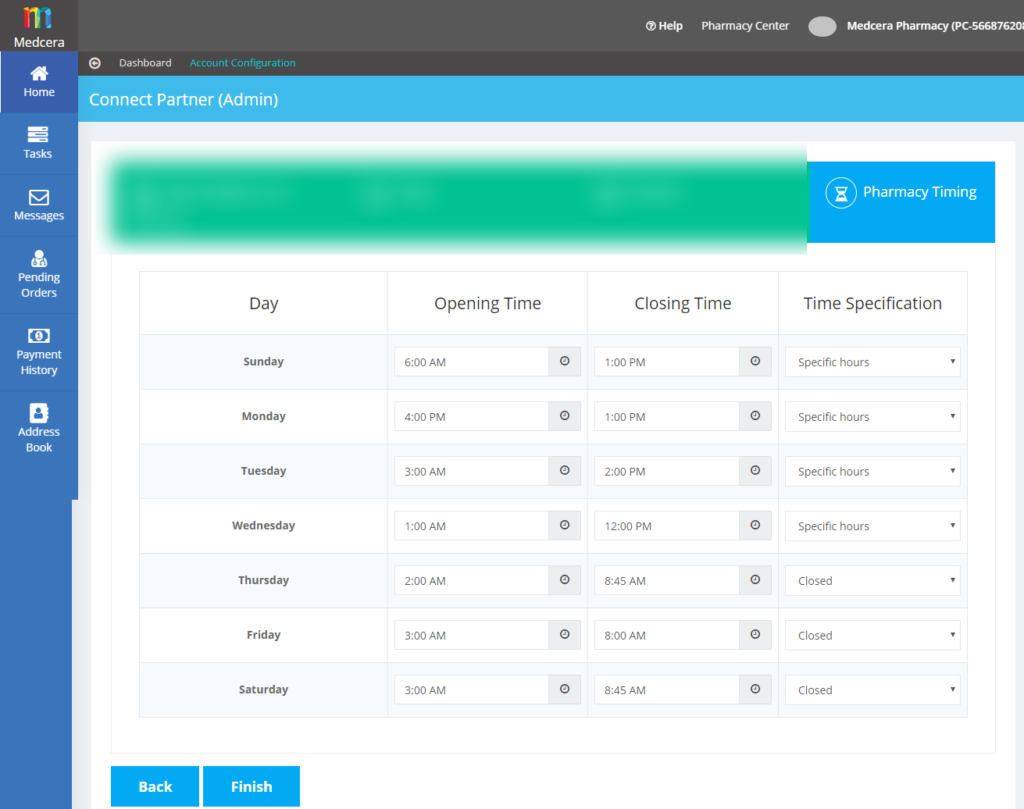
- In account configuration, the page below shows pharmacy timing including the day of availability, opening and closing time.
- Note that the timings is decided by pharmacy center admin.
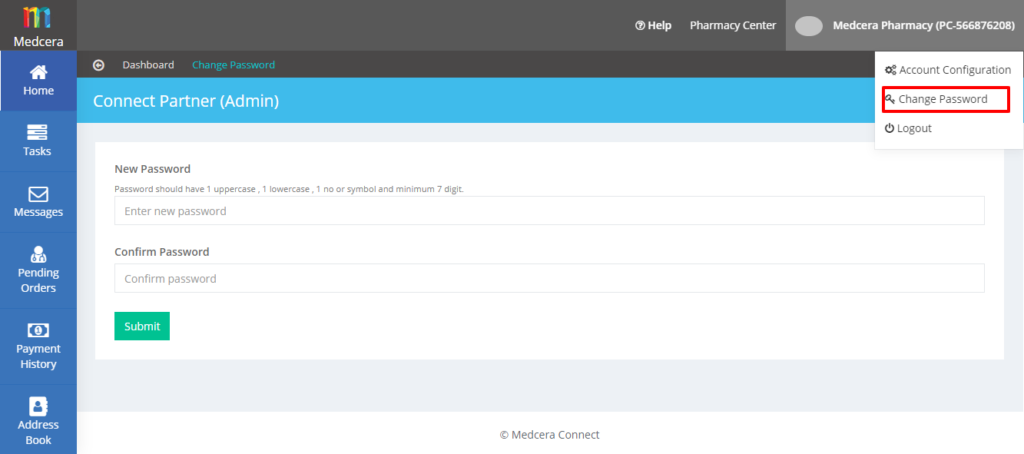
- Click on ‘Change Password’ to reset change/reset password under the profile tab. Enter a new password, confirm the password and submit by clicking the ‘Submit’ button as shown below.
- Click on “Log Out” from drop-down menu to log out from the account as shown below.
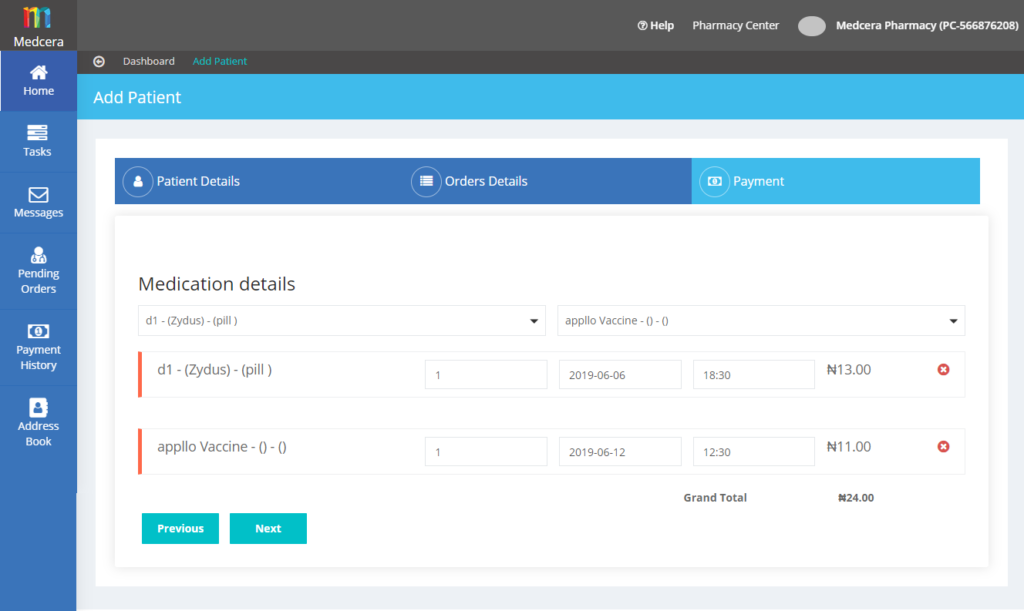
- Tap on “Add Patient and Place Order” on the dashboard and fill our the fields to place order as shown below.

- Fill out “order details” as shown below.
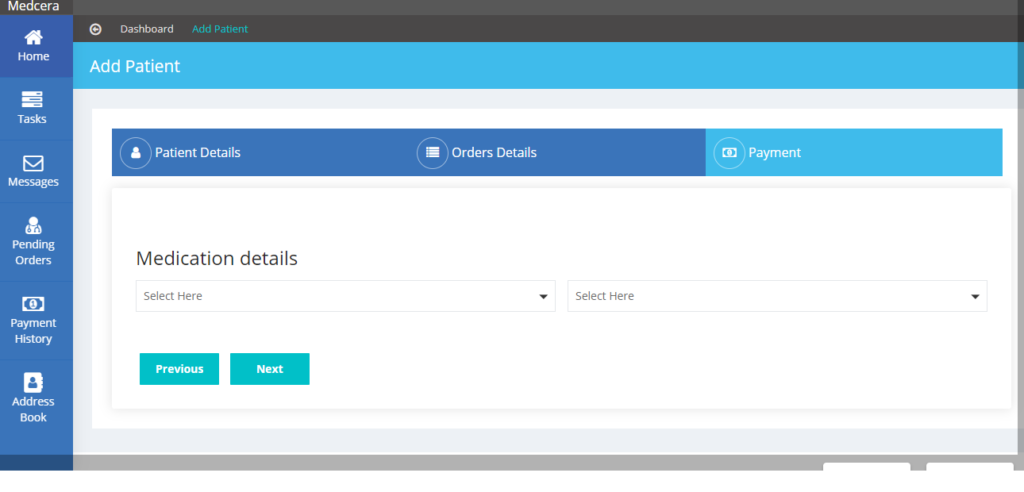
- Fill out “ Payment” details details as shown below.
- Click on “search user and place order“ card on the dashboard to place order for existing patient on Medcera platform. see image below.
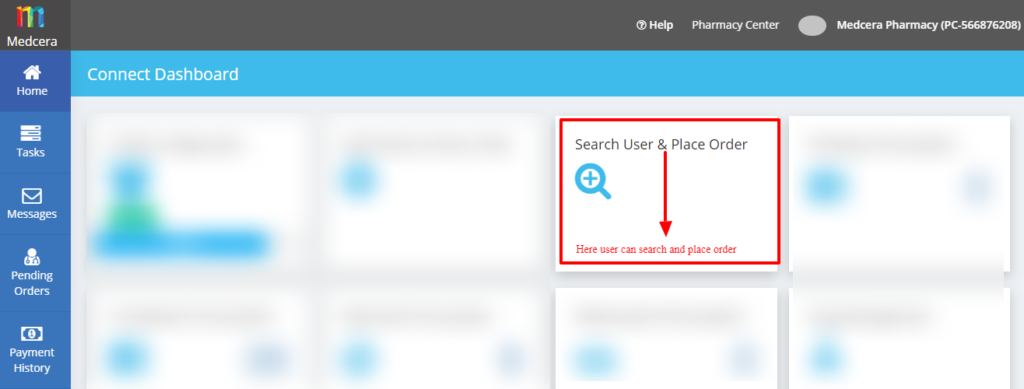
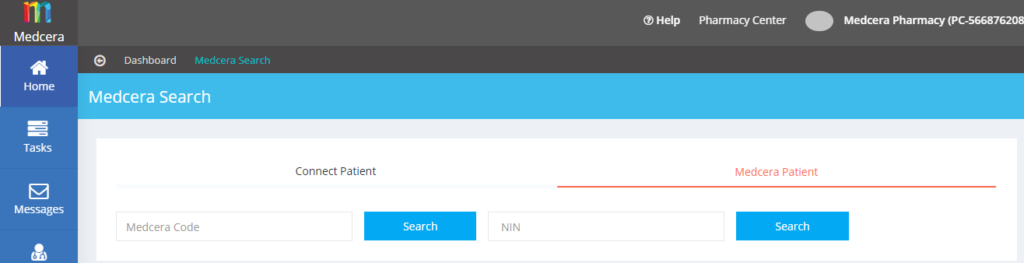
- Click on either “Connect Patient” or “Medcera Patient” to search, fill out the mandatory fields and place order as per requirement.
- This is for“Connect Patient” where you can search according to Medcera Code and Patient Name and their birth data.

- A search with Medcera Code using “Connect patient” search tab displays the screen below.
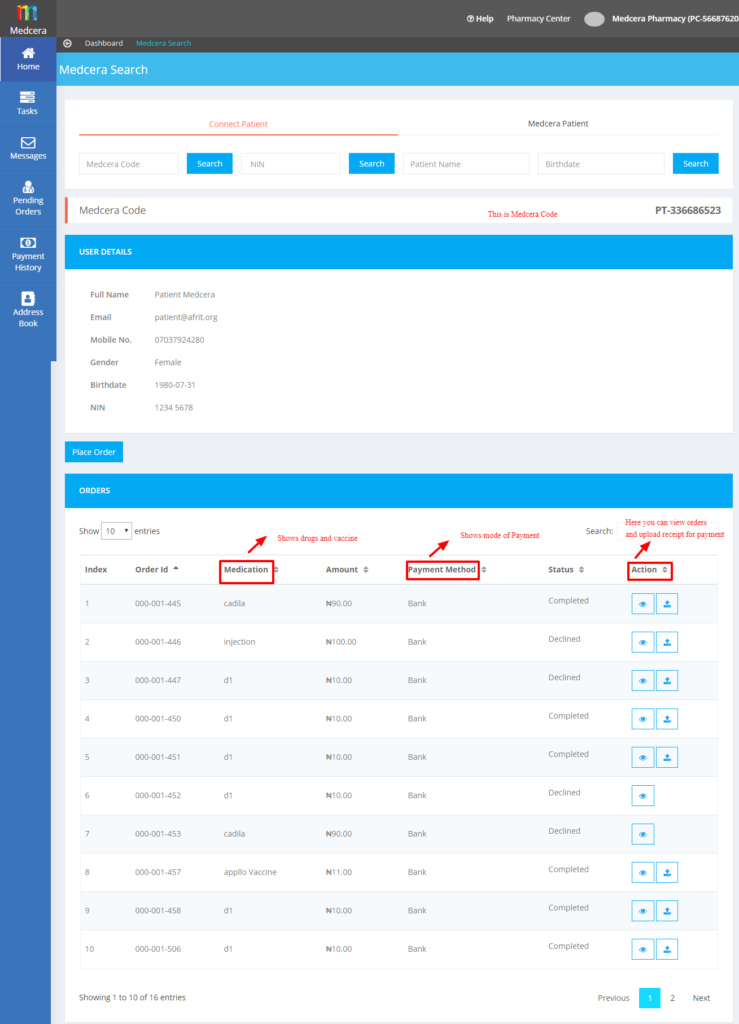
- This is for “Medcera Patient” where you can search according to Medcera Code and NIN. Medcera Code is the unique identification code which is generated during account activation.
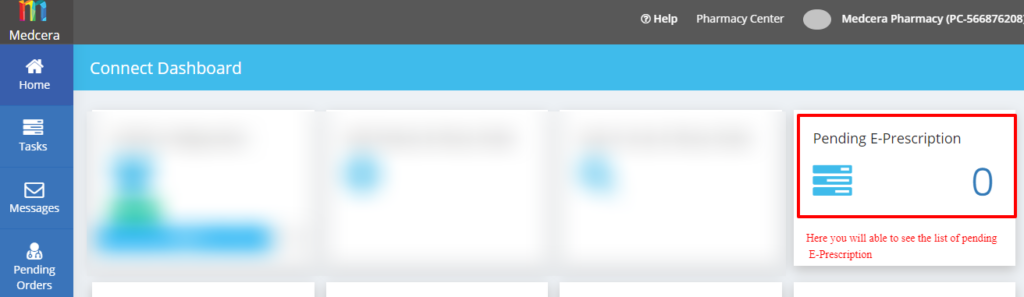
- Click on “Pending E-Prescription“ card on the dashboard to view the list of Fusion and Patient pending orders. Pending E-Prescription order shows the list of orders placed by fusion and patients but have not been accepted by Medcera Pharmacy. These orders can either be accepted or rejected by pharmacy center. when pharmacy center rejects an order, reasons are given for rejection.
- Fusion orders are the orders which are directly prescribed for patients by doctors.
- Fusion Order is directly approved or rejected by Pharmacy.
- See below “Pending E-Prescription“ of Fusion Orders.
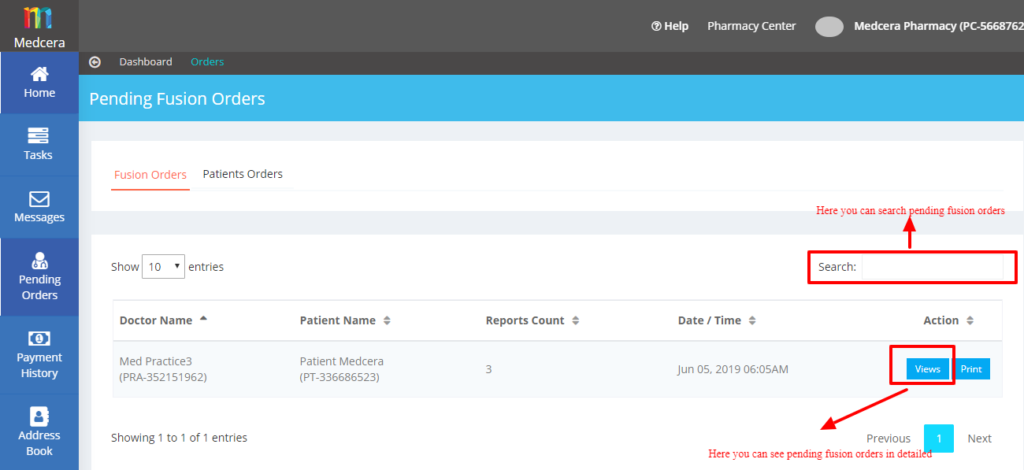
- A click on view displays the screen below.
![]()
- Patient Orders are the orders that are placed by patients only. It is self prescription.
- Patient Orders is presented with drug and vaccine options to select and the order will be approved or rejected.
- See below list of “Pending E-Prescription“ of Patient Orders
- After clicking on views you will able to see below screen:
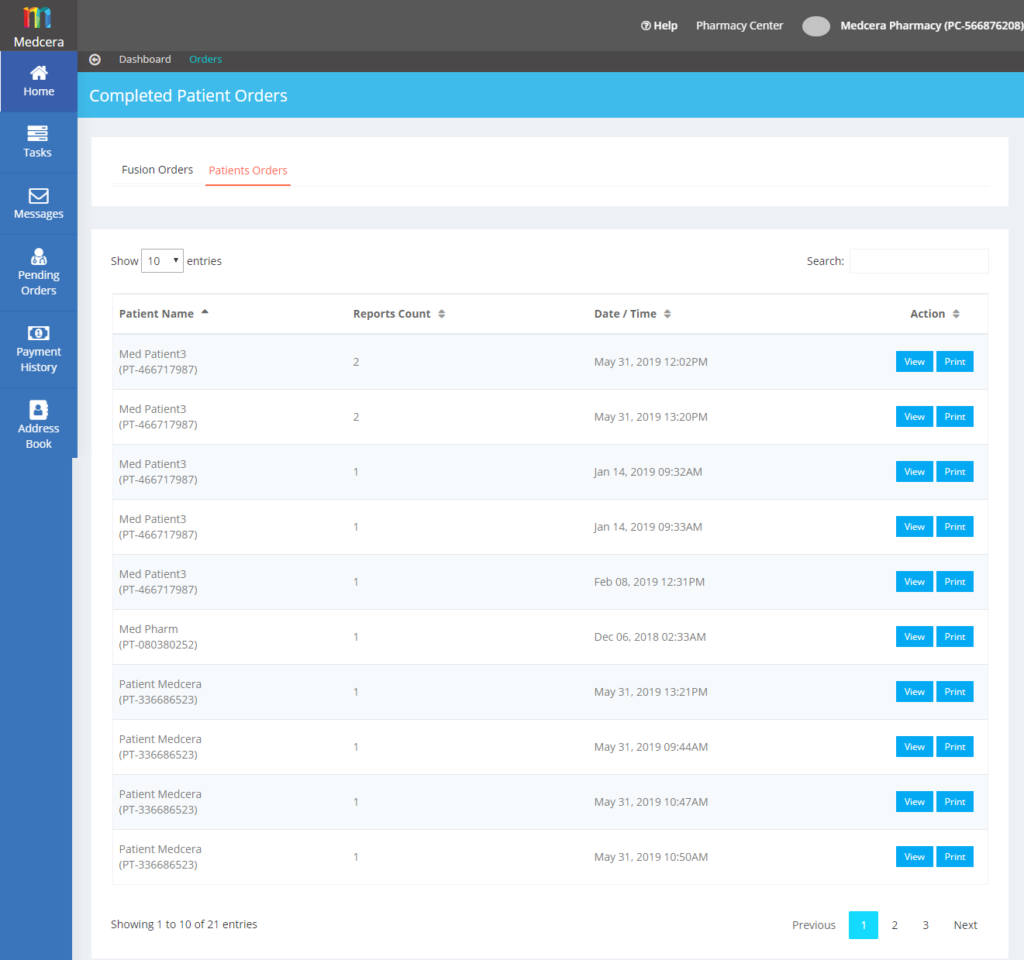
- Click on “Completed E- Prescription” on the dashboard to view the list of Fusion Orders and Patient Orders which are approved by Medcera Pharmacy.
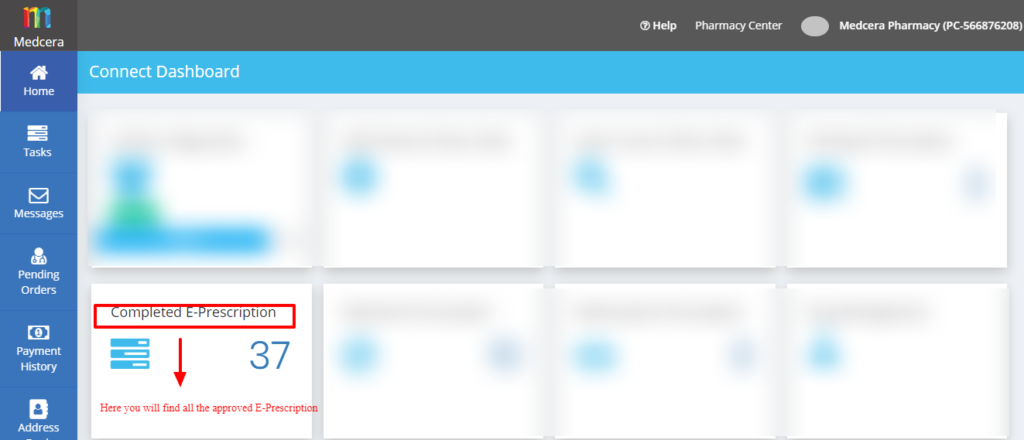
- The screen shows the list of Completed E-Prescription of Fusion and Patient Orders.
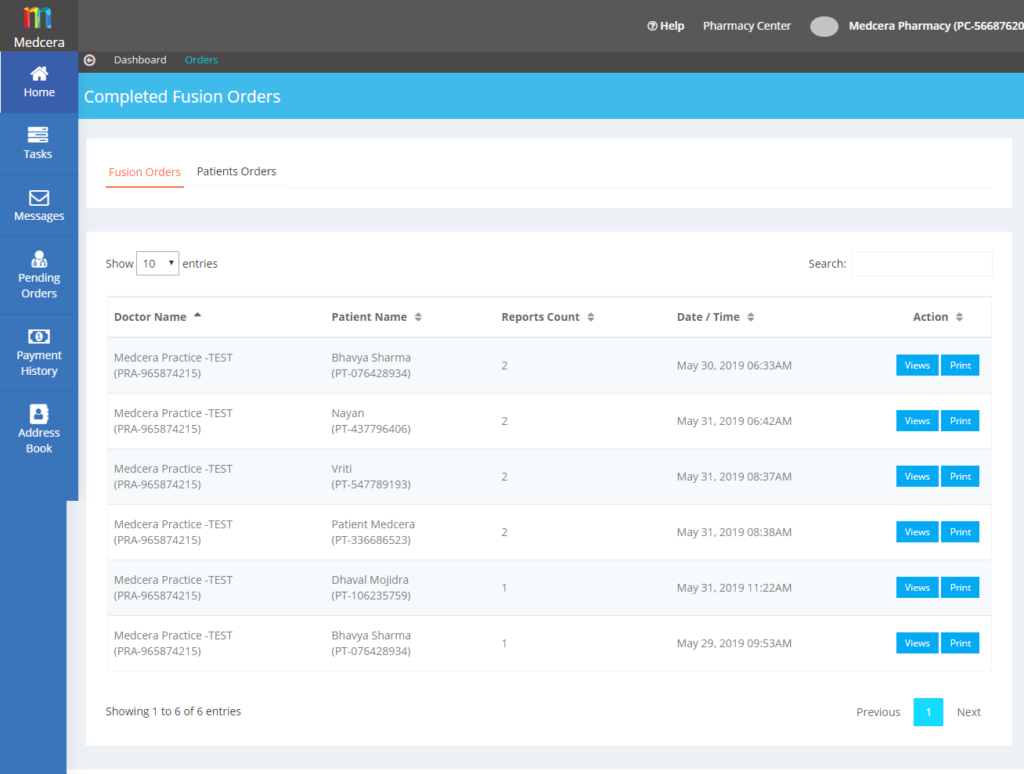
- A click on “views” displays the screen below.
- A click on “views” displays the screen below.
- Click on “Completed E- Prescription” on the dashboard to view the list of Fusion Orders and Patient Orders which are approved by Medcera Pharmacy.
- The screen shows the list of Completed E-Prescription of Fusion and Patient Orders.
- A click on “views” displays the screen below.
- Click on “Rejected E-Prescription” on the dashboard to view the list of prescriptions declined by pharmacy as seen below.
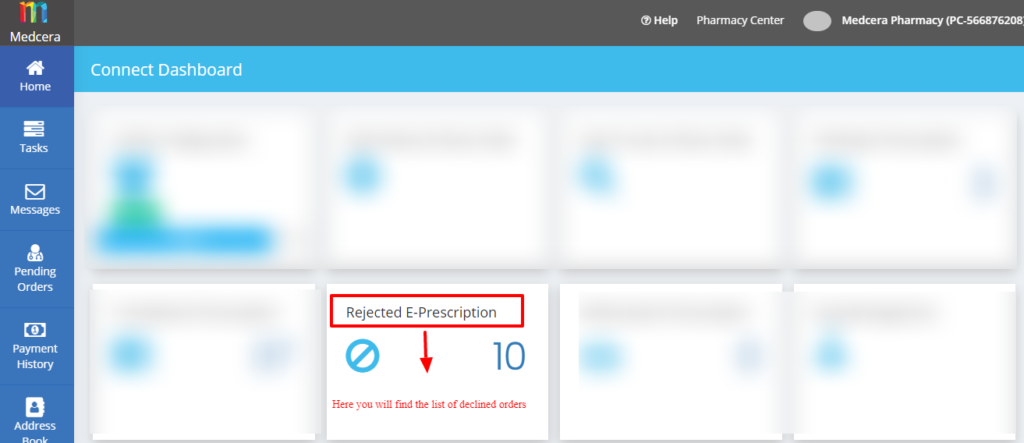
- “Rejected E-Prescription” shows Fusion Orders with Doctor Name, Patient Name, Reports Count, Date/Time and Action.
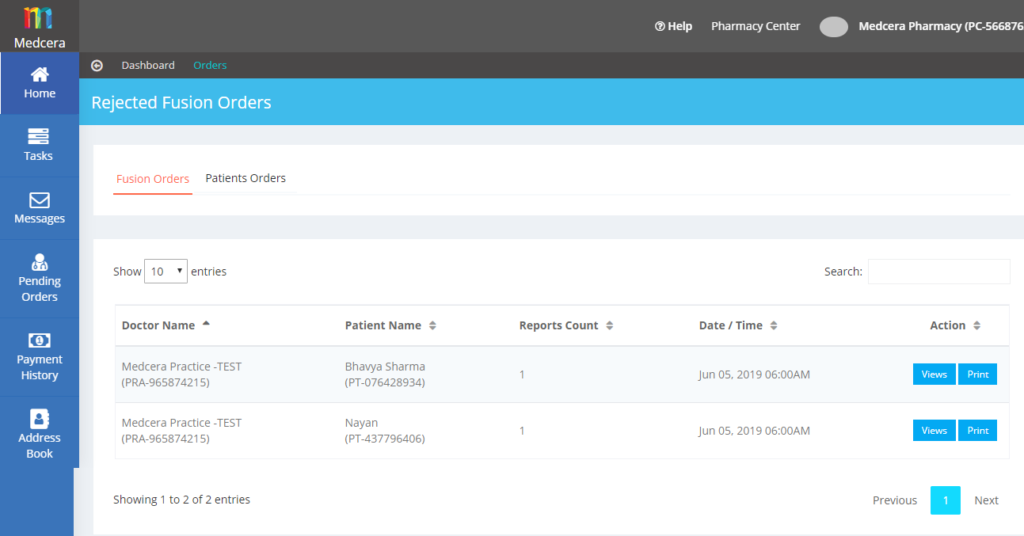
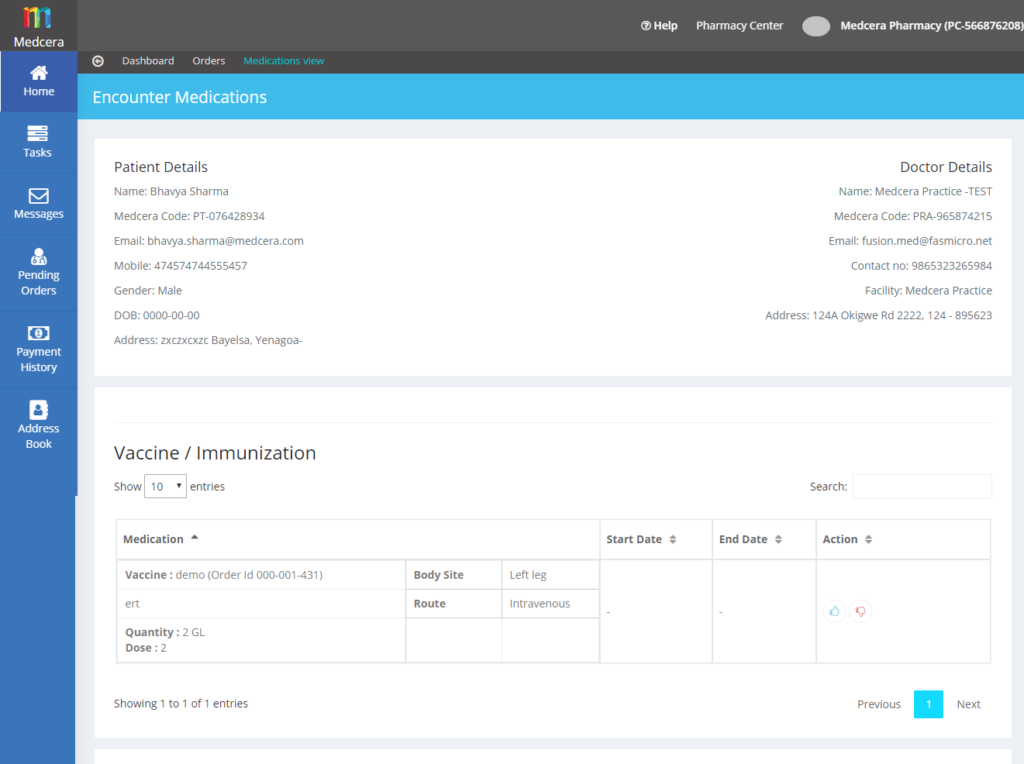
- A click on “views” displays the list of rejected Fusion orders in detail.
- “Rejected E-Prescription” shows Patient Orders with Patient Name, Reports Count, Date/Time and Action.
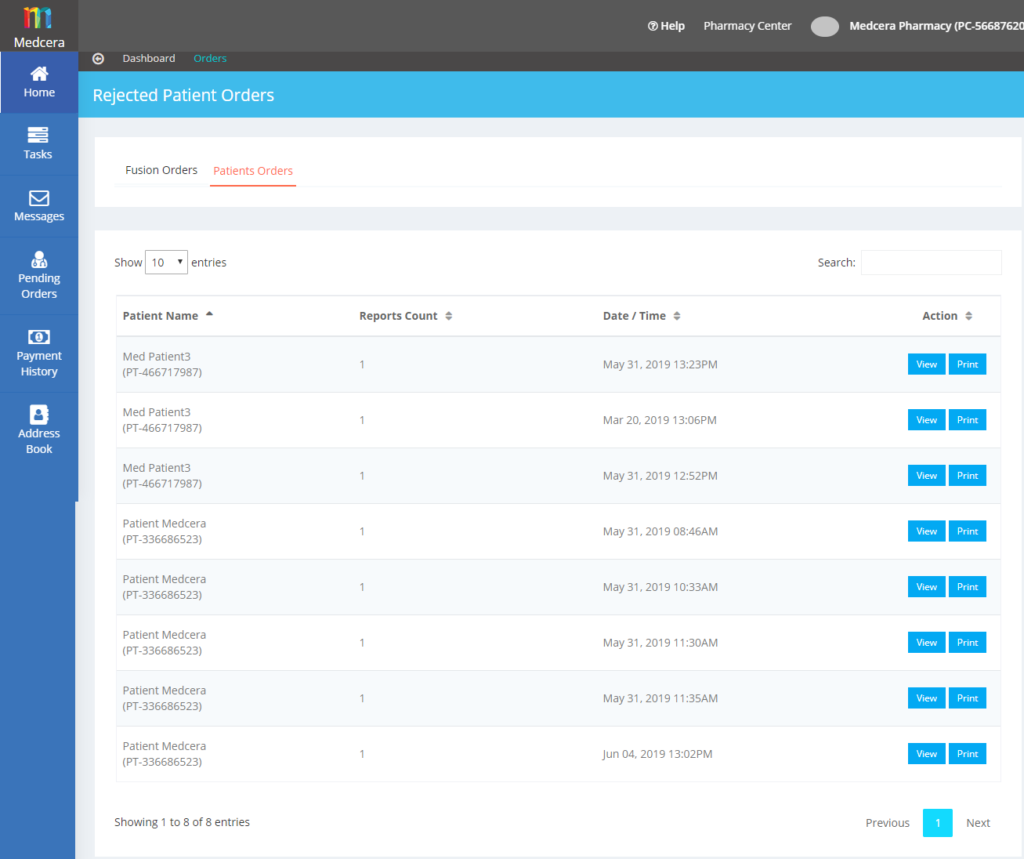
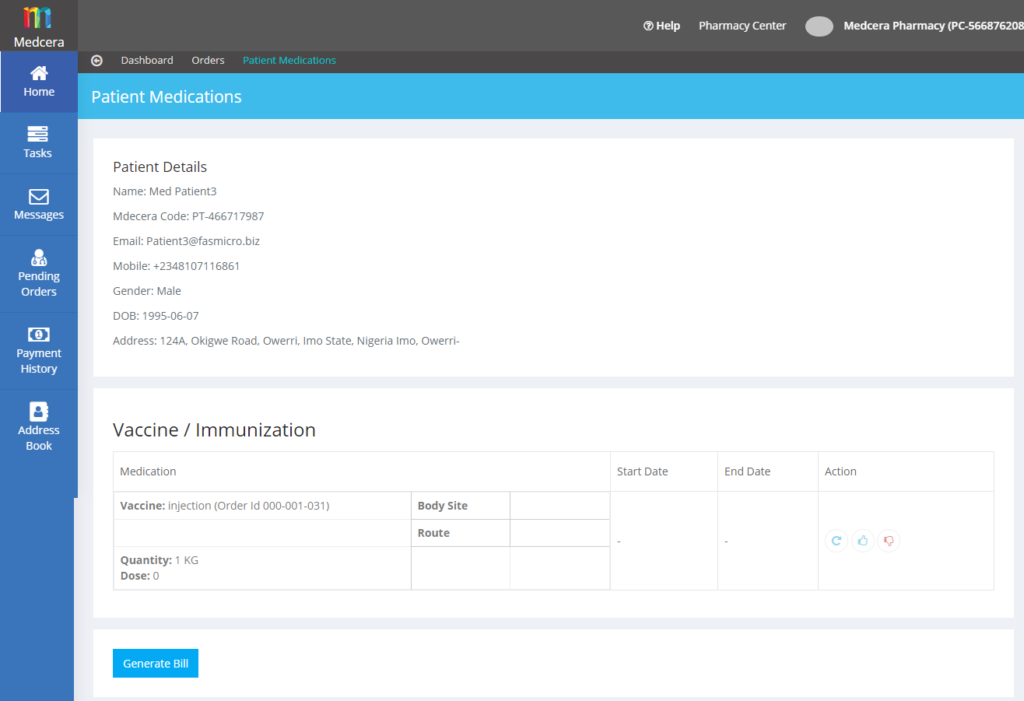
- A click on “views” button displays the list of rejected Patient orders in detail.
- Tap on “Reallocate E-Prescription” to view the list of prescription declined by a pharmacy and the same prescription order will be place to another Pharmacy as shown below.
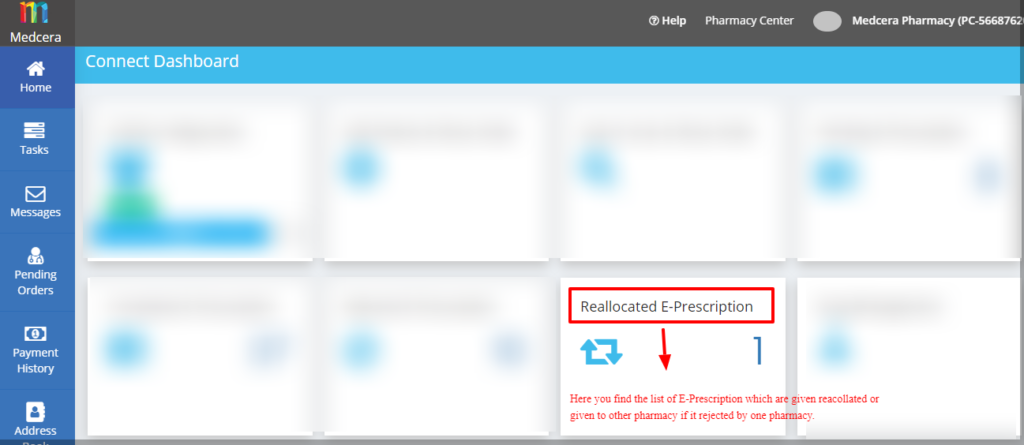
- “Reallocate E-Prescription” displays the list of Fusion Orders that are reallocated to the other pharmacy.
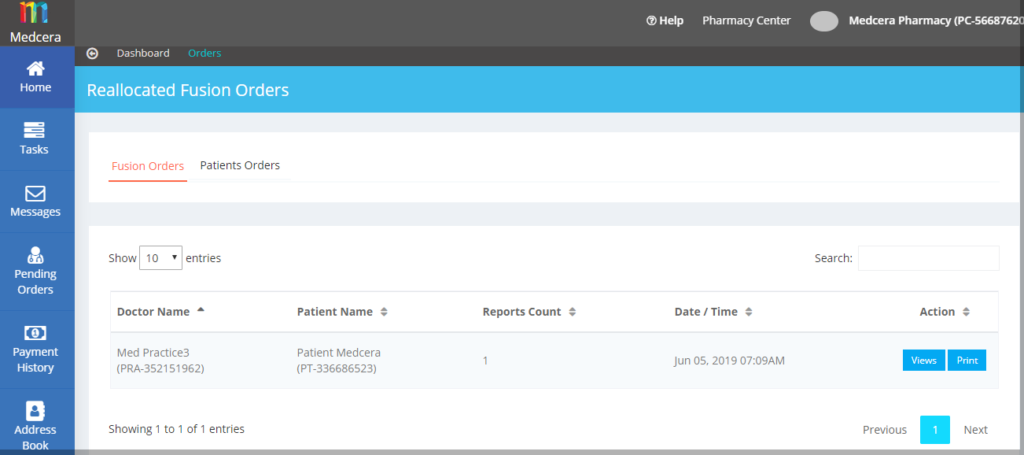
- A click on Views shows Fusion Orders that are reallocated to another pharmacy.

- “Reallocate E-Prescription” displays the list of Patient Orders that are reallocated to another pharmacy.
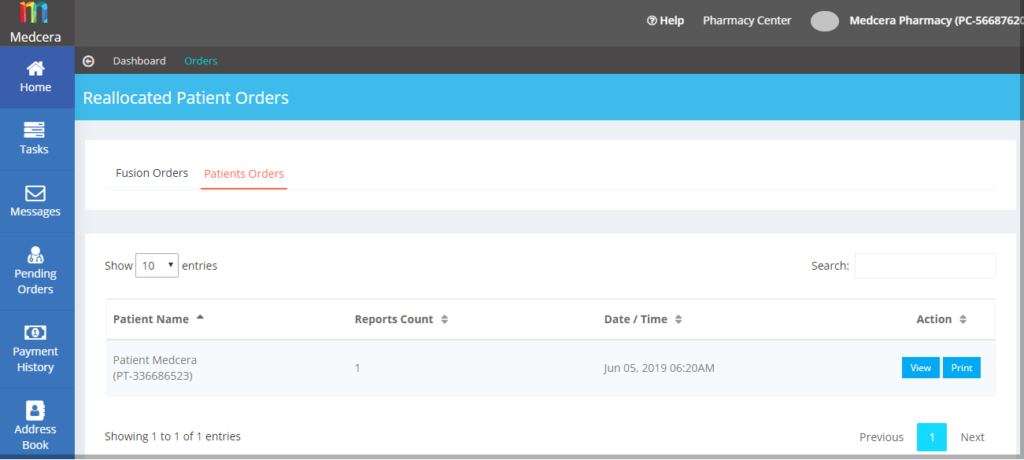
- A click on Views displays Patient Orders that are reallocated to another pharmacy.

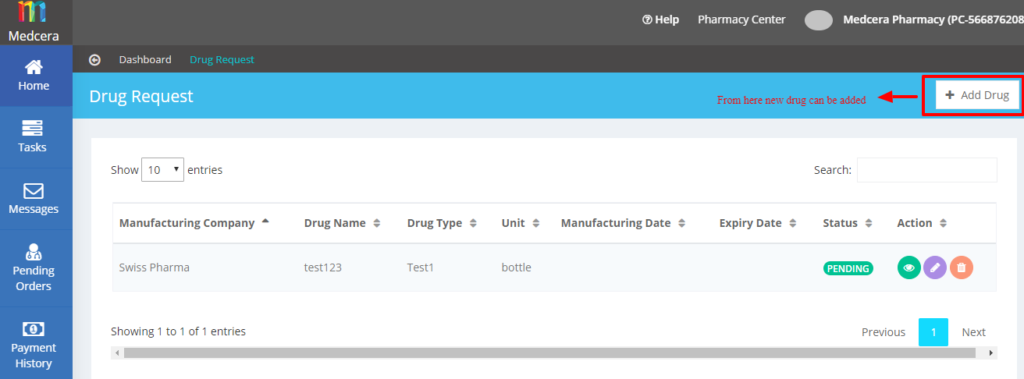
- Click on “Drug Management” to view the list of drugs requested by patients that are not available in Medcera Pharmacy and new drug can be added.
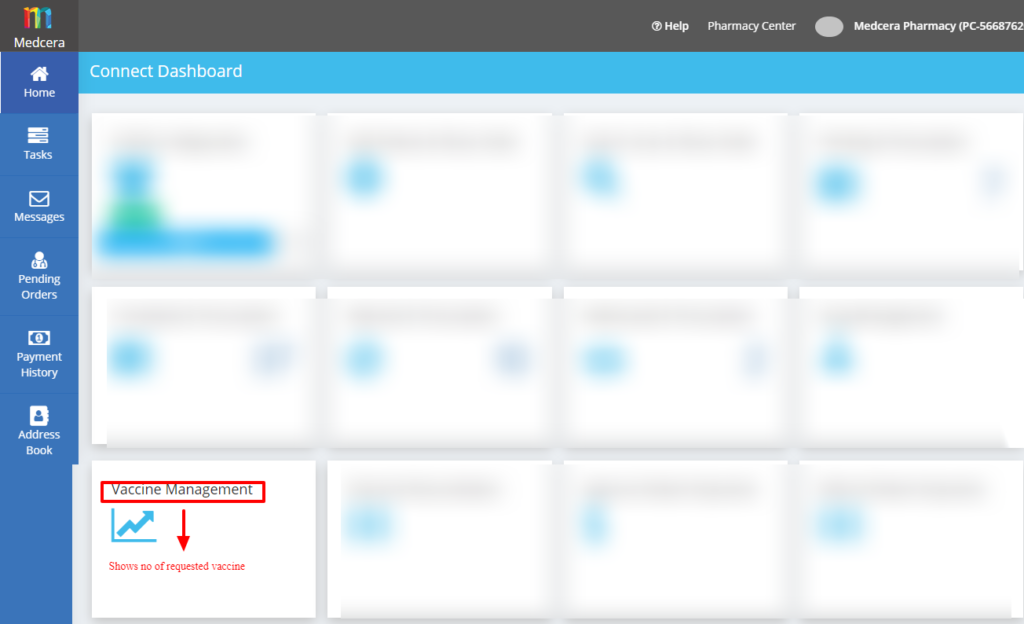
- Click on “Vaccine Management” to view the list of vaccines requested by patients that are not available in Medcera Pharmacy and new vaccine can be added.
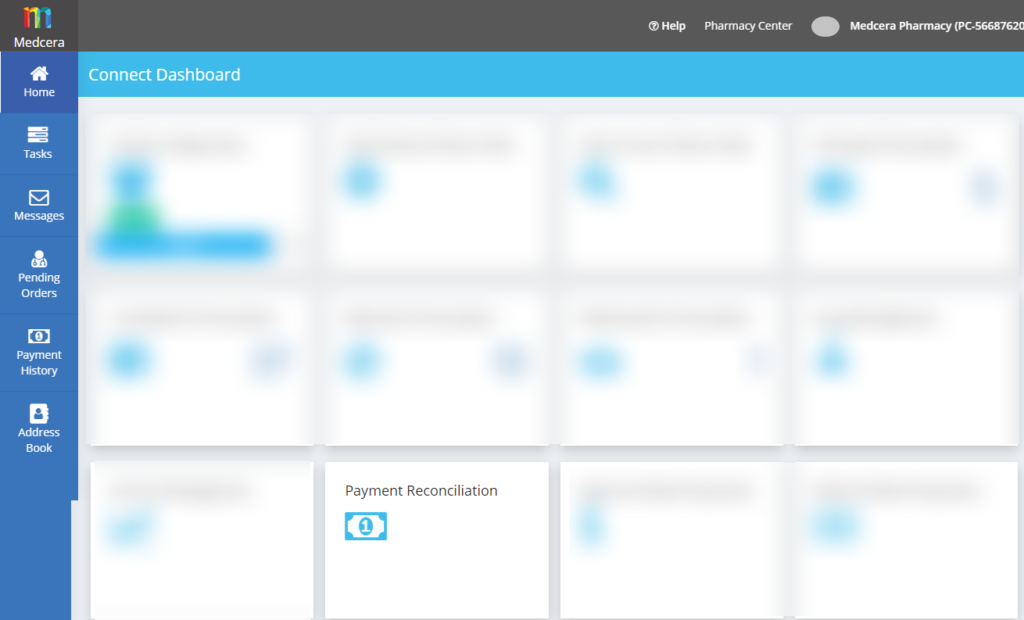
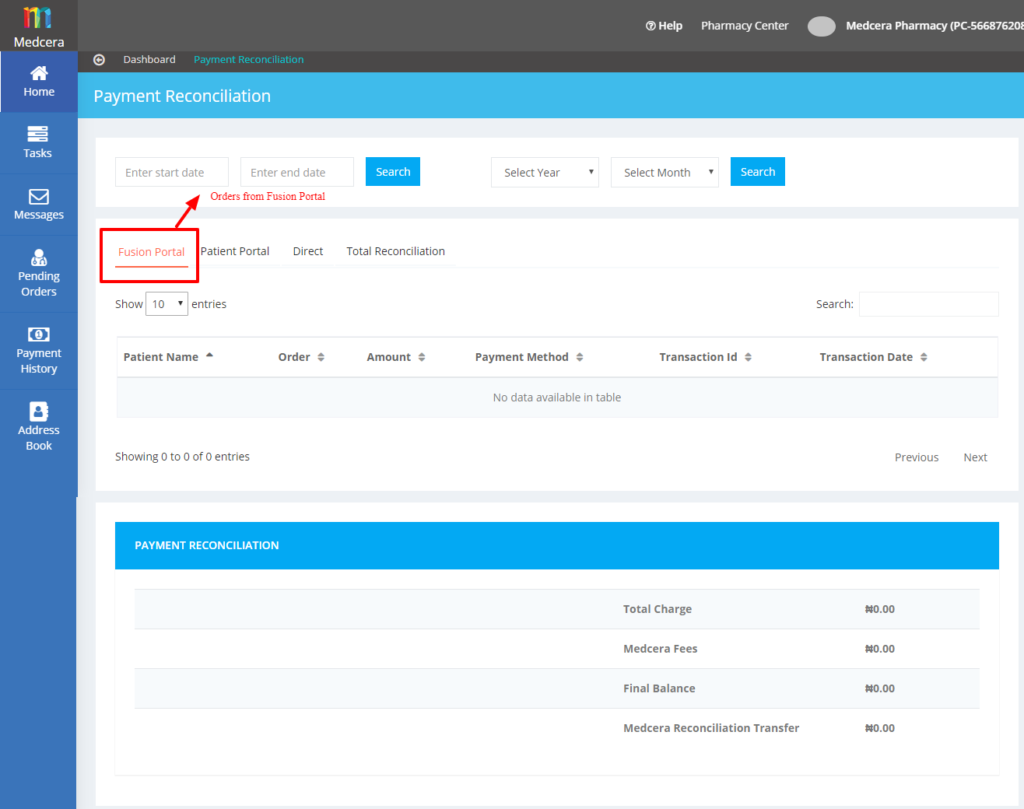
- Click on “Payment Reconciliation” button to view the three parts of payment reconciliation as shown below.
- Fusion portal (This portal shows the orders placed by Fusion portal.)
- Patient Portal (This portal shows the orders placed by patient only).
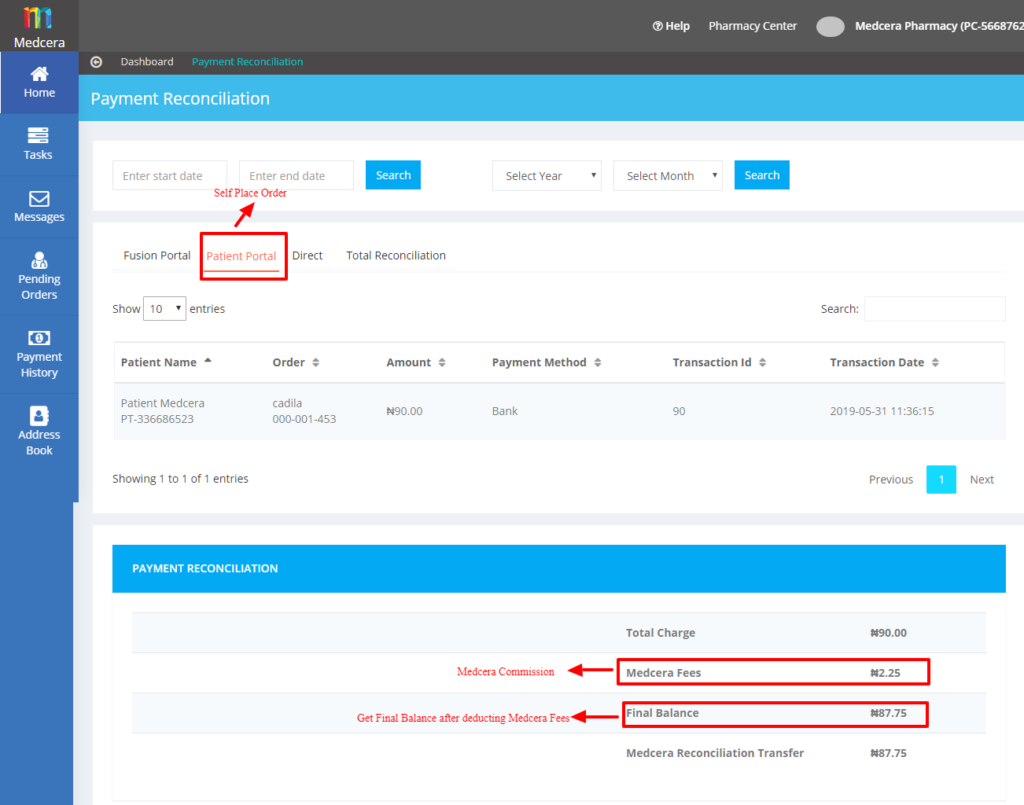
- Direct (It shows orders placed from “Connect Portal”). Note that patients will not pay Medcera Fees as it is generated directly from the connect portal.
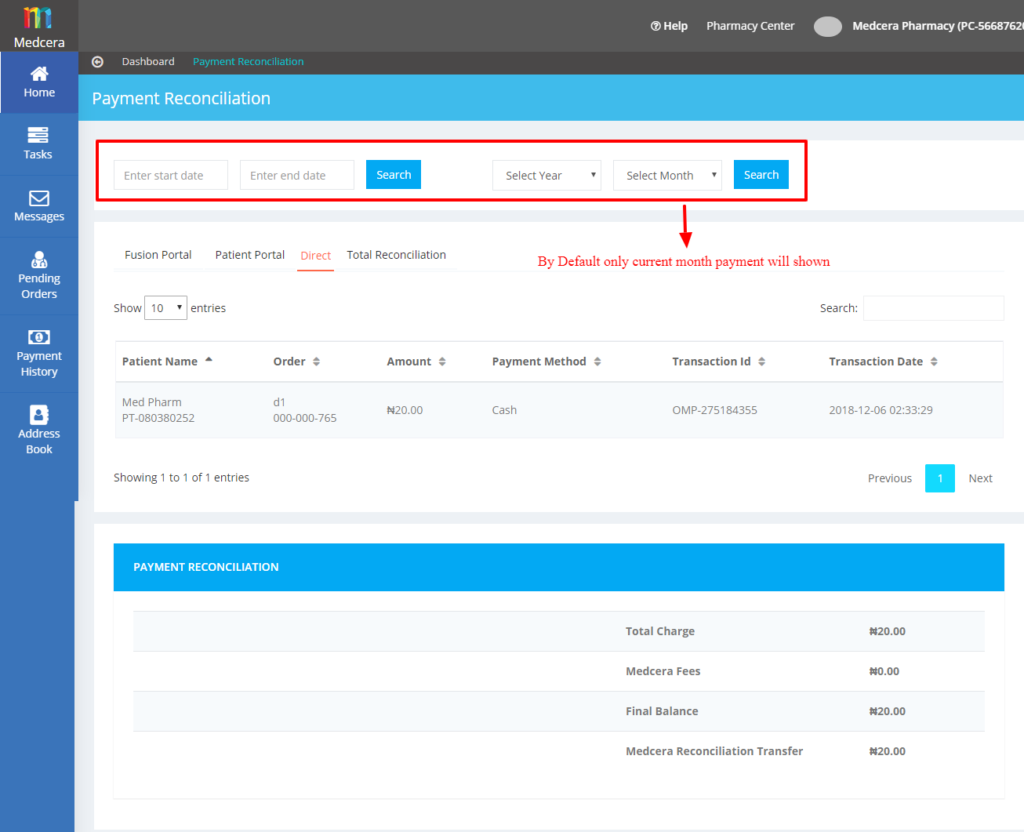
- Total Reconciliation (This is the total payment made in the three parts above: Fusion Portal, Patient Portal and Direct)
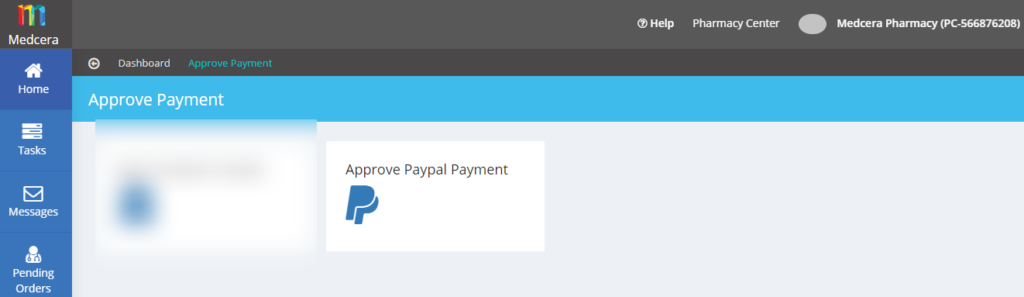
- Click on “Approve Patient Payments” card on the dashboard to view Approve Bank Transfer and Approve Paypal Payment options.
- Approve Bank Transfer: Bank Transfer payment option requires patient to make payment through the bank.
- Upon successful payment, they will get a receipt from the bank to upload.
- Connect partner confirms payment made by patient and approves the payment.

- Approve PayPal Payment: This is the payment made for orders placed from connect partners.
- A click on payment displays Me for patient”s view (This link will be generator from Account Configuration)
- In order to get an activation link in Email, patients have to Click on Me to receive activation link via Email.
- Click on Account Activation in your registered Email to generate transaction ID.
- Upload the ID into Upload Receipt in Patient Portal.
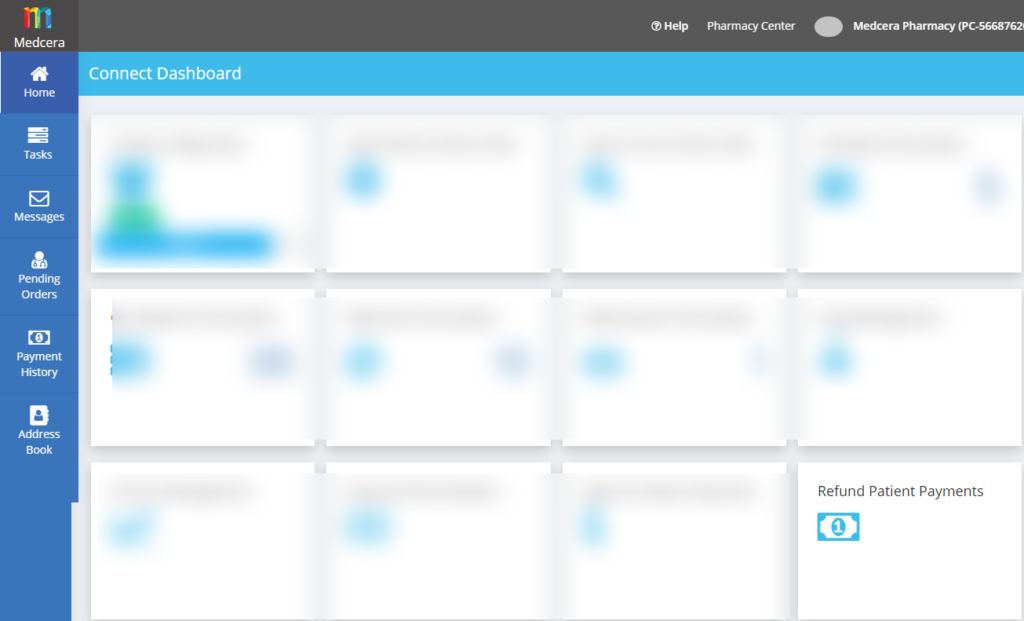
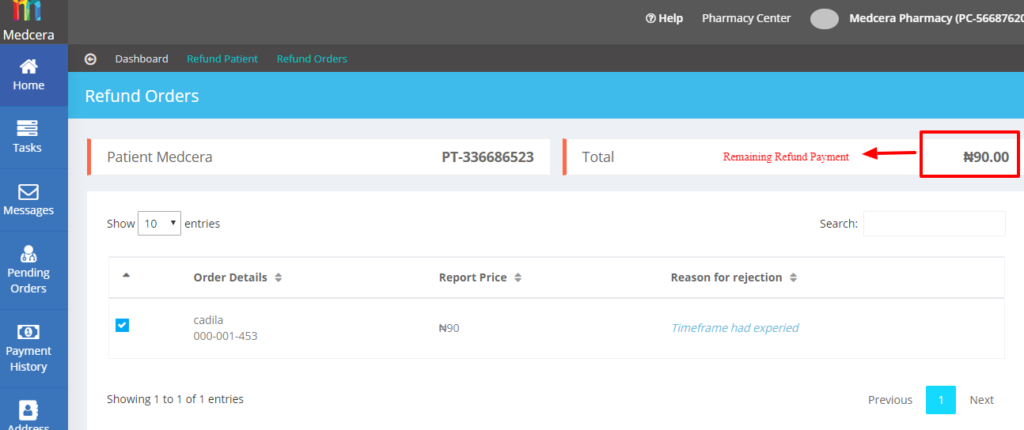
- Click on “Refund Payments” button on the dashboard to view the list of rejected orders for which payments have been made.
- A click on “View Orders” tab displays orders that have not been refunded as shown below.
- Click on “View Bills” to view “upload receipt” option as shown below.
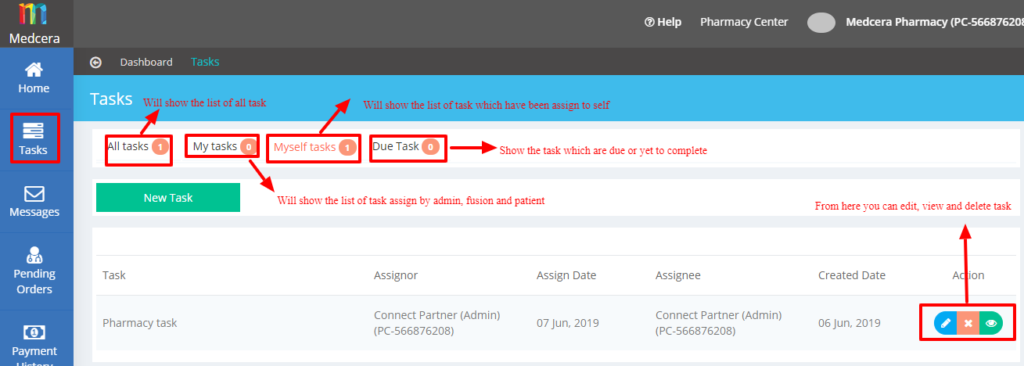
- Click on “Task” button on the dashboard to see task type defined by Admin, Fusion and Patient.
- All tasks: shows the list of tasks assigned by a user to another user or to self.
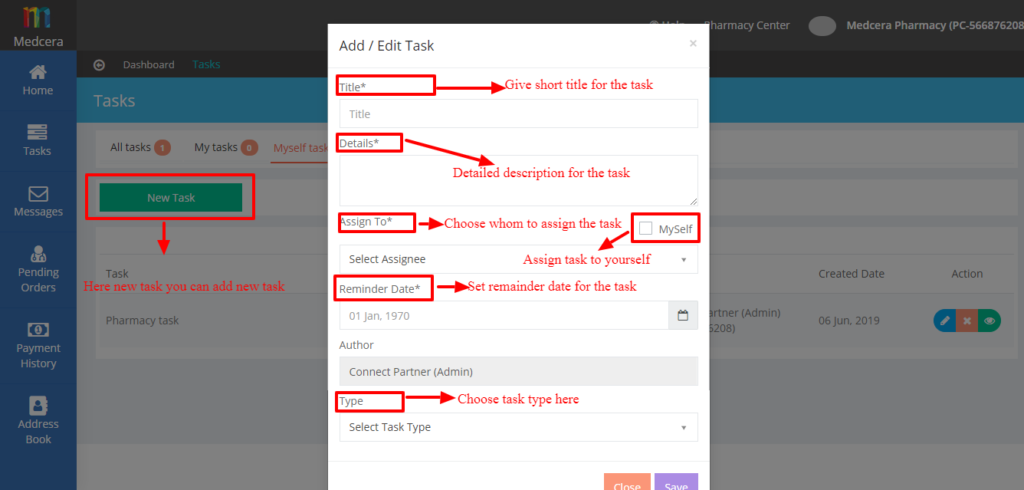
- Click on New Task to add a new task as shown in the screen below.
- Click on “Messages” to send message to multiple users and they will receive the message in their portal.
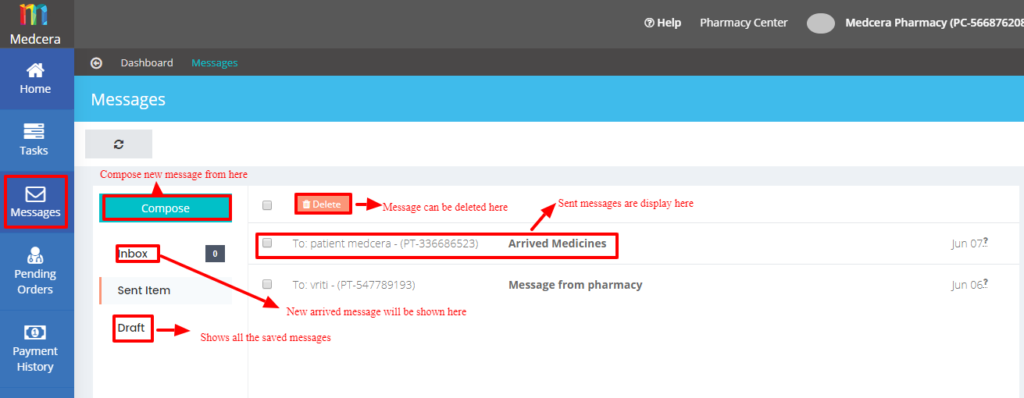
- Click on “compose” to send a message as shown below.
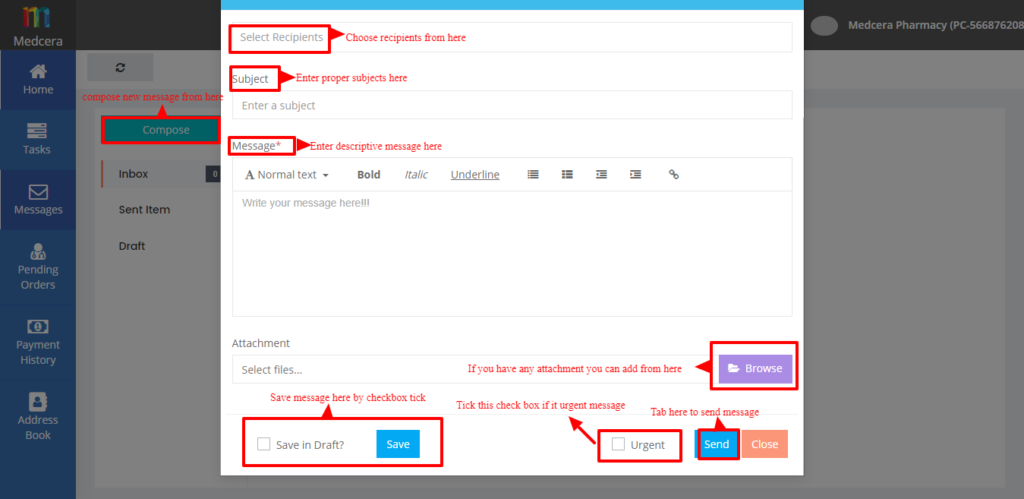
- Click on “Sent Item” to view sent Messages.
- “Message has been sent successfully”will be displayed at the top of the screen.
- Click on “Pending Order “ button in the side bar menu on the dashboard to see the list of Fusion orders and Patient orders. Pending Orders are orders placed by fusion and patients which are yet to be accepted by Medcera Pharmacy. These orders can be accepted or rejected by pharmacy. When the orders are rejected, pharmacy gives a reason for the rejection.
- Fusion orders are the orders which are directly prescribed to patients by doctors. These orders are directly approved or rejected by Pharmacy.
- See Fusion “Pending Order“ below.

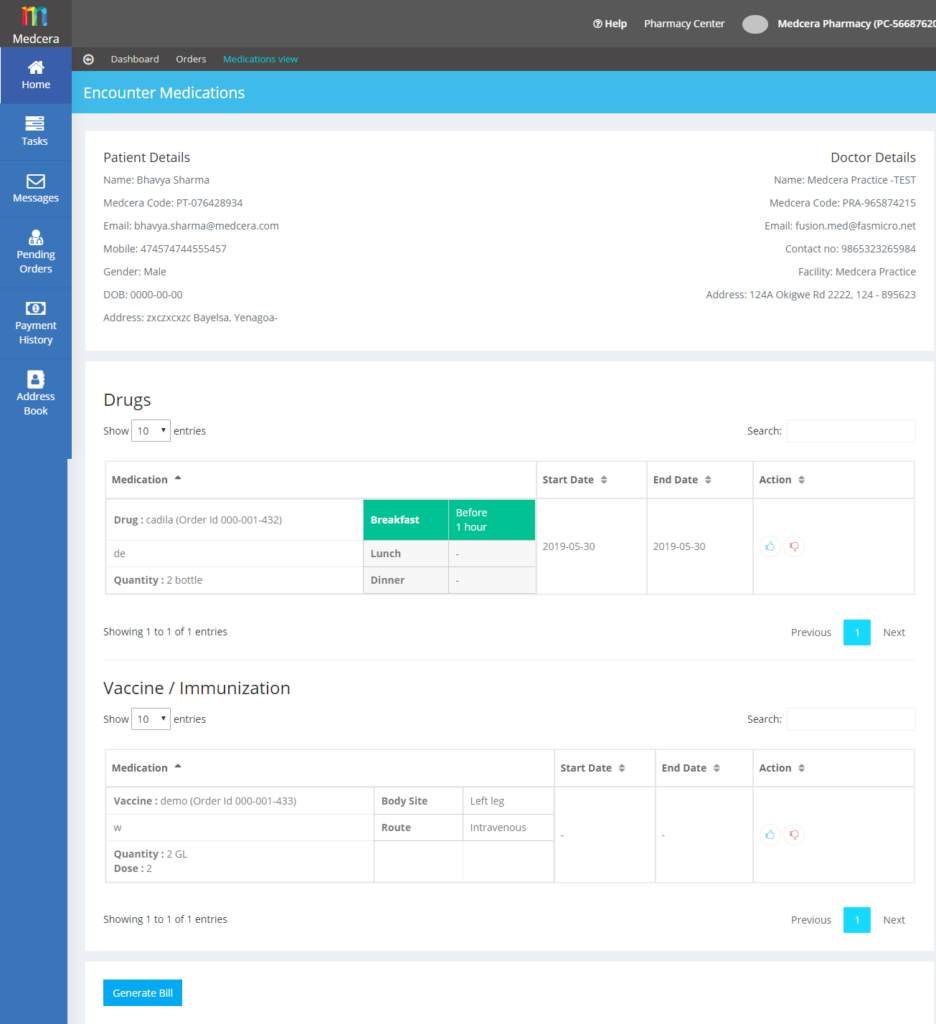
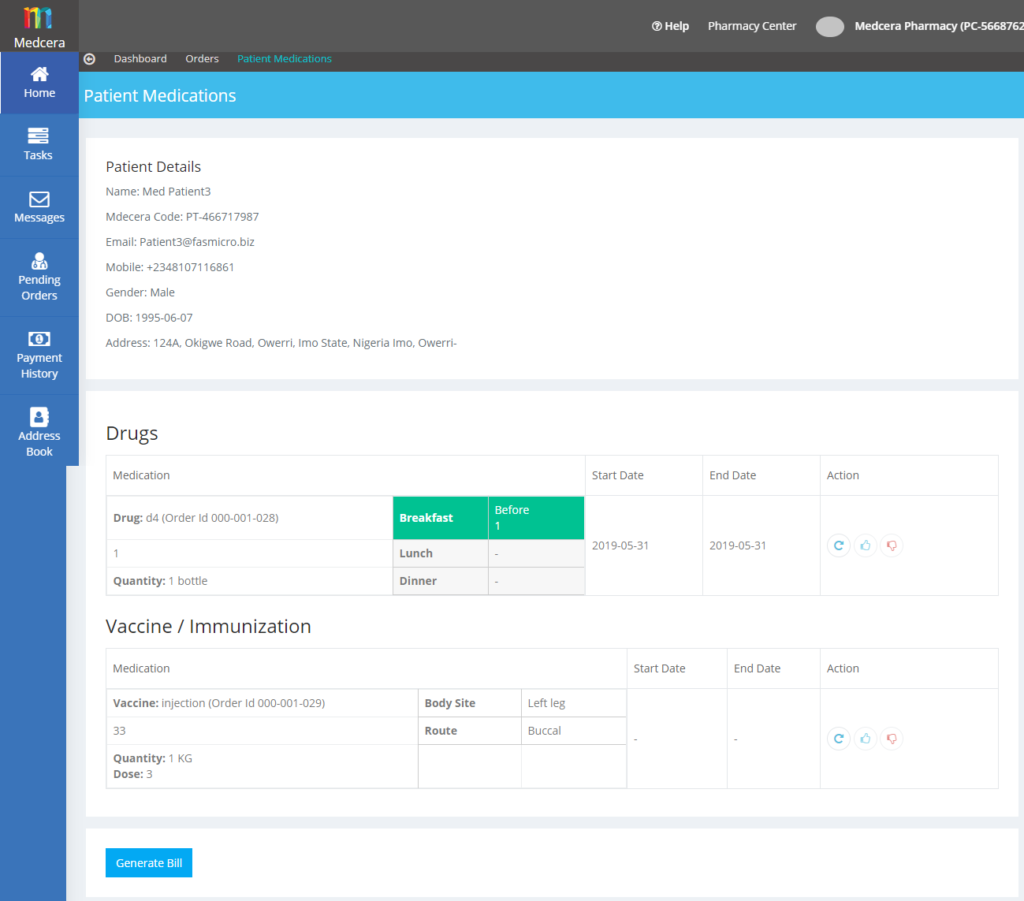
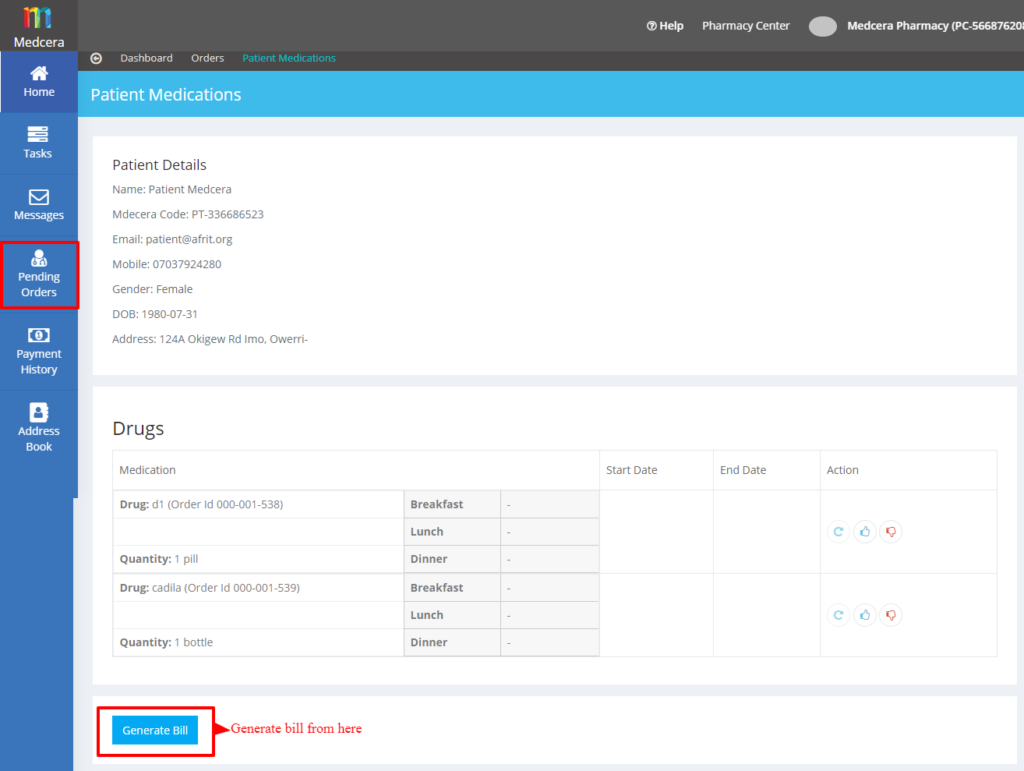
- A click on views displays the screen below.
![]()
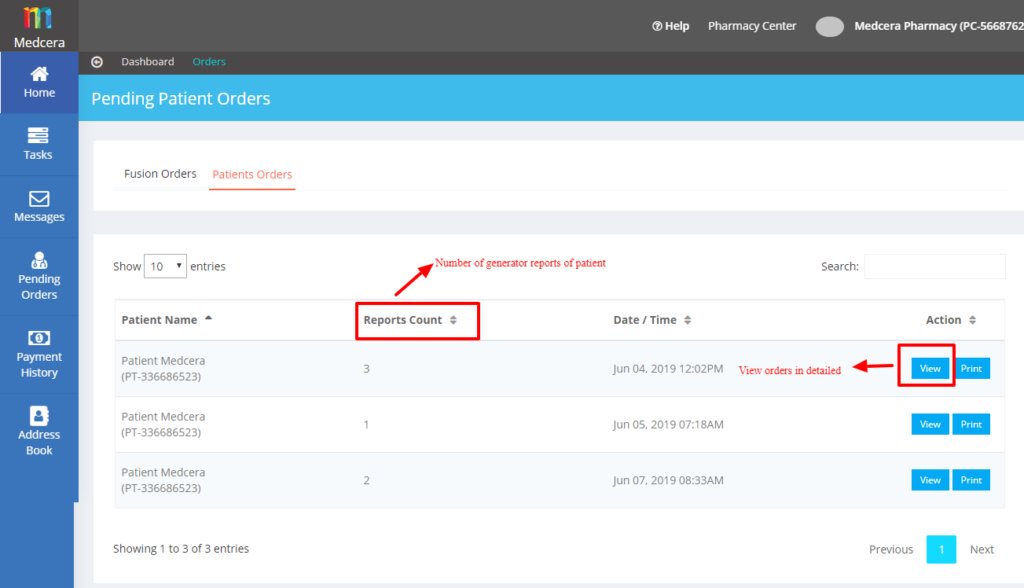
- Patient Orders are the orders that are placed by patients only. Patient places either order for drugs or vaccines and pharmacy approves or reject the orders.
- See patient “Pending Order “ below.
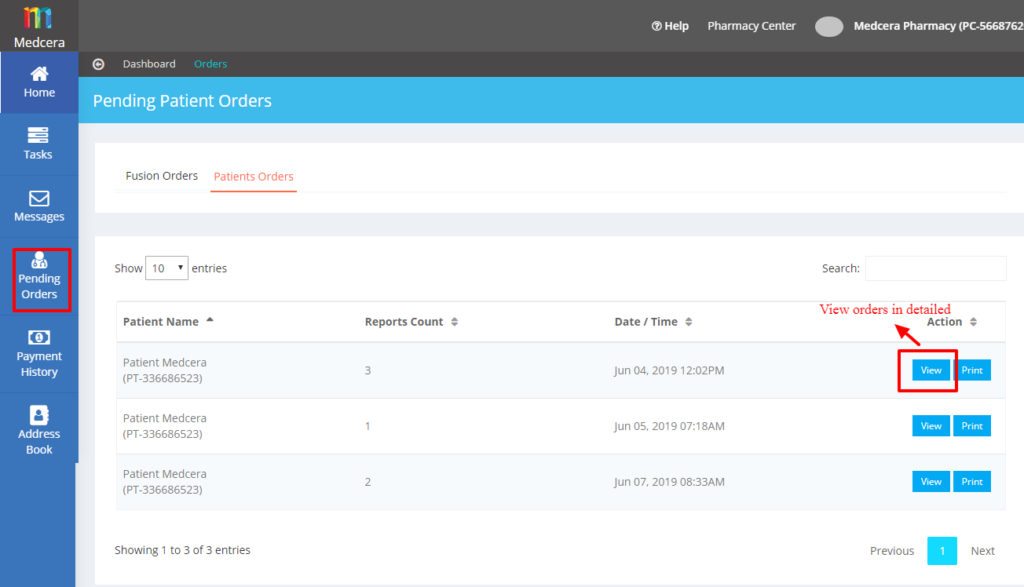
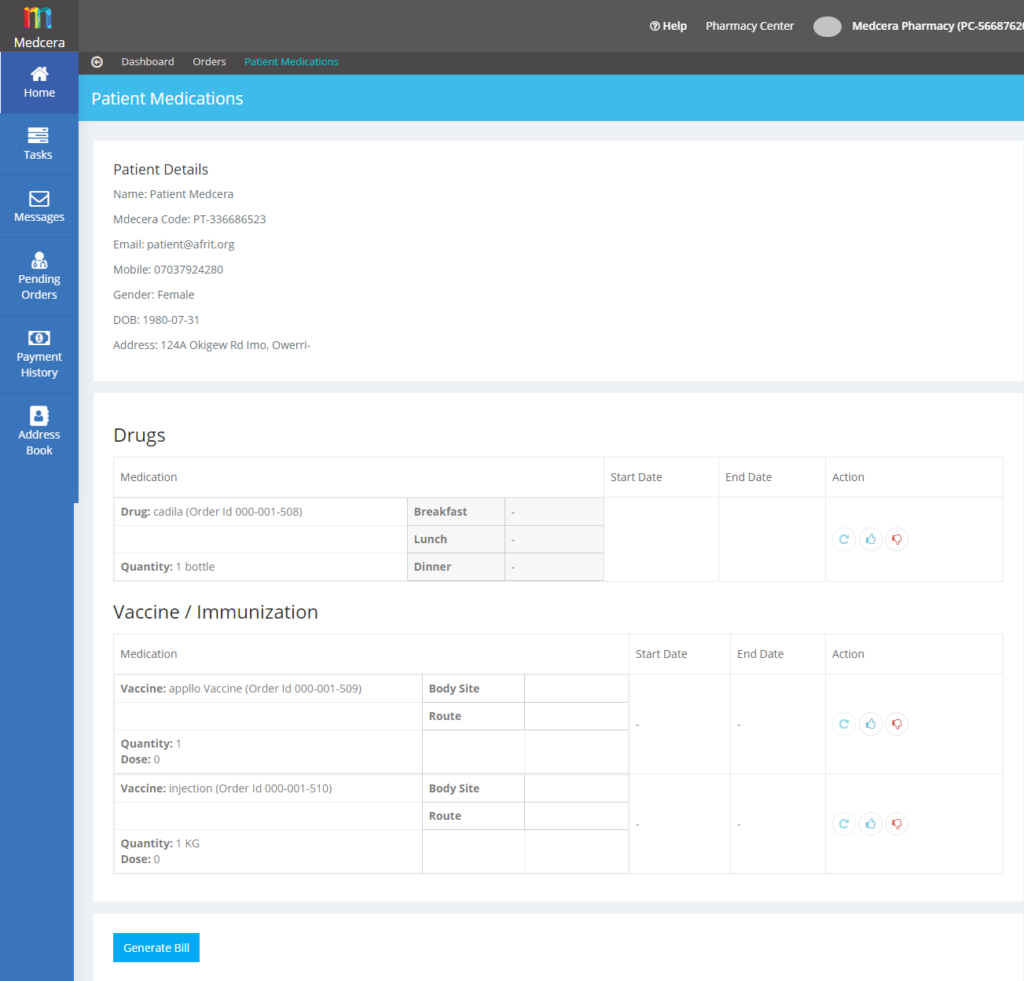
- A click on views shows the screen below.
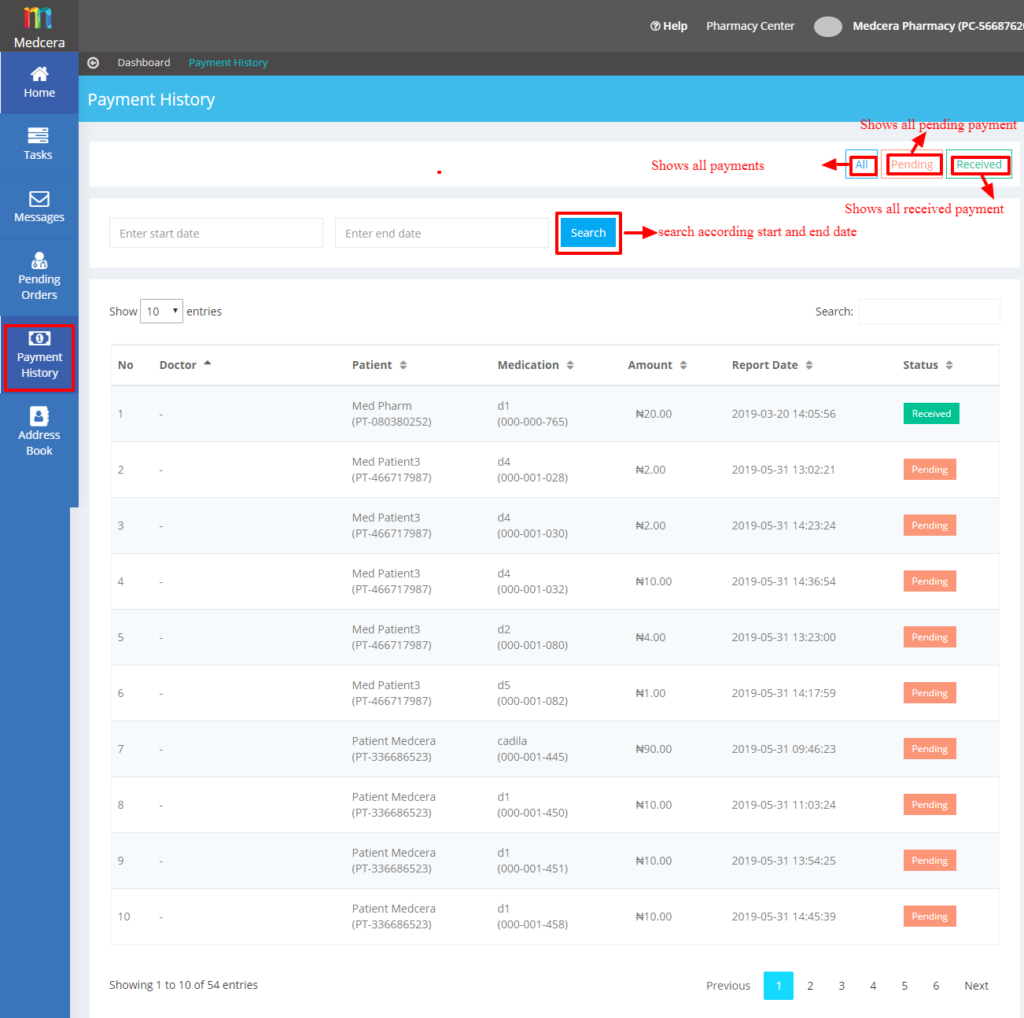
- Click on “Payment History” button in side bar menu on the dashboard to view all payment history as shown below.
- Click on “Address Book” button in the sidebar on the dashboard to create two types of address book as shown below.
- Click on “Normal Address” tab to add all relevant details in the address book as shown below.
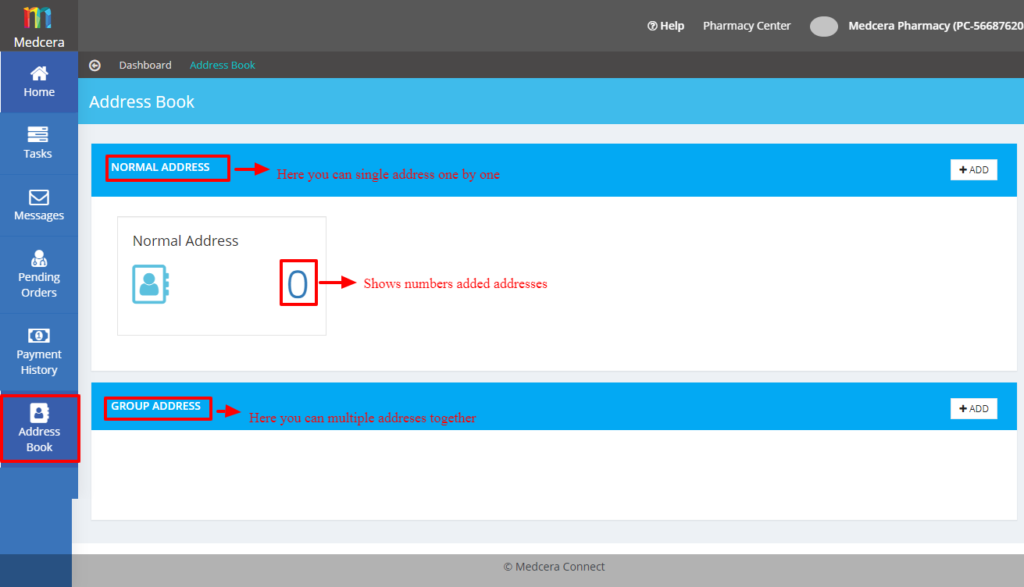
- After adding the address, the screen below displays.
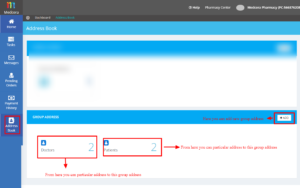
- Group Address: Click on Group Address to create group and then add an address to that group.
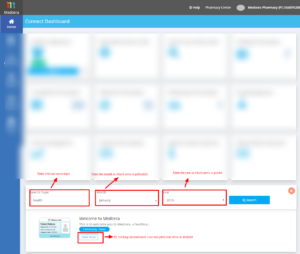
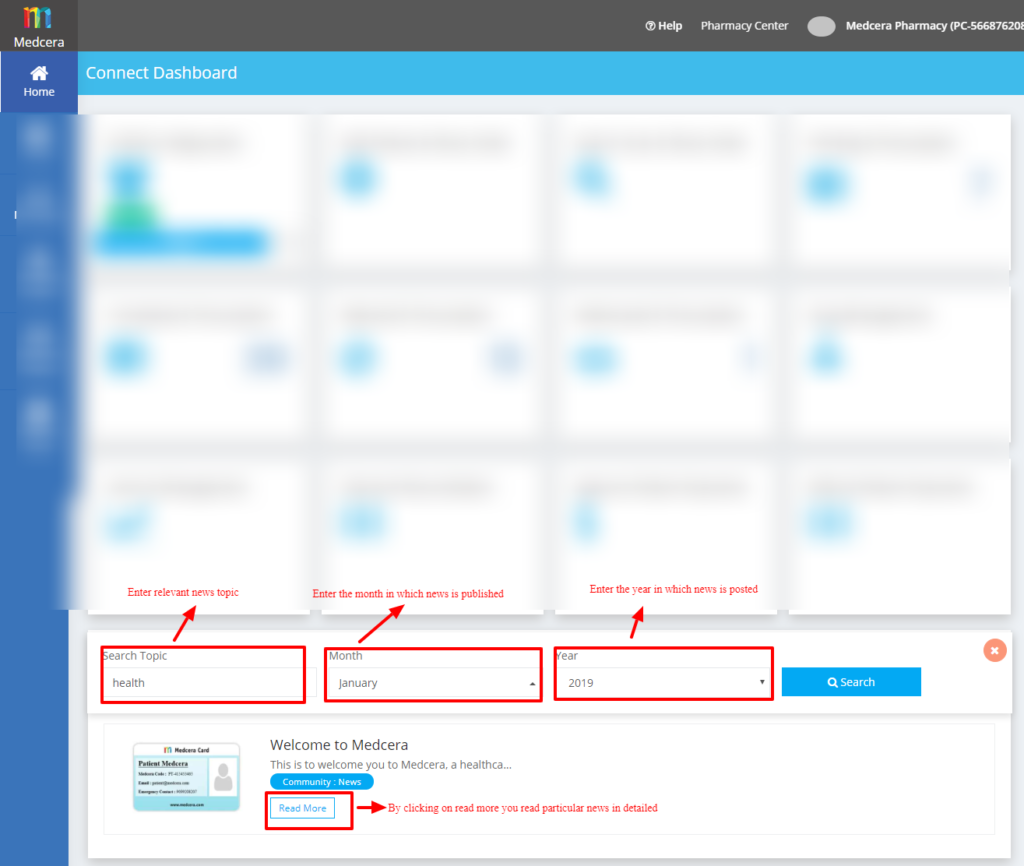
- The “News” section is where Medcera admin post any news Medcera and Health news which can be read by users as shown below.
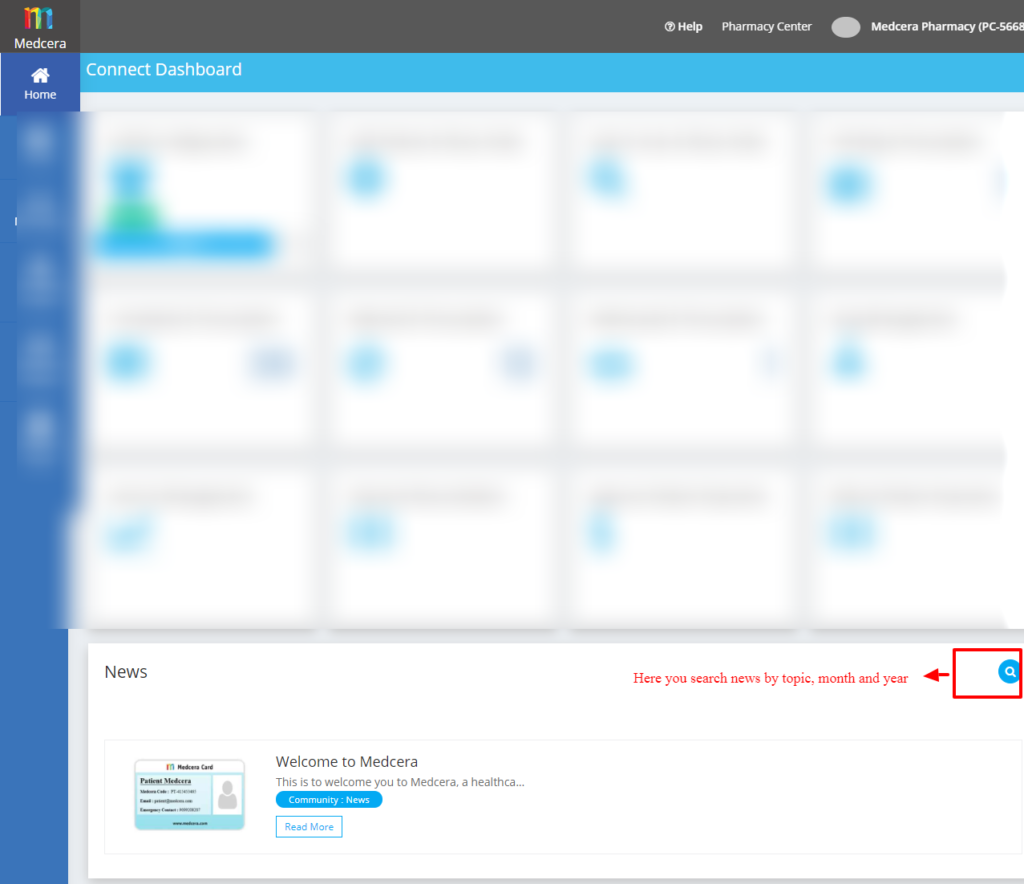
- Click on search symbol to view the screen below.